

K2 is a powerful Hardware Asset Management tool. The KeyAccess client collects many hardware properties which are saved in the Computer Database. However, Computer records also have some additional fields that can be populated individually or in bulk using a choice of methods. This post will show how to populate those fields via a data import. You can read about other ways to populate these fields in the Using Asset ID for IT Asset Management (ITAM) with K2 post.
We will set up an example that will populate both the built in Asset ID field and a “Custom” computer field based on a match to the computer name field. First we need to define our custom field. Right click in the column header area of the Computers window to expose the dialog where we can define up to 10 custom fields:
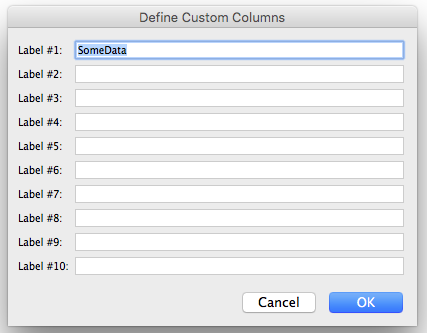
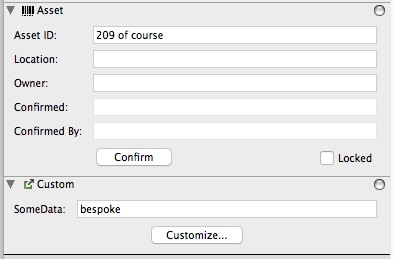
Here we have entered the utterly generic name for our field, “SomeData”. This will subsequently appear in the Computer Details window.
Next we make a comma separated text file of data to be imported. This might be a CSV file exported from some other system or perhaps it will be convenient to organize data in a spread sheet and then export in CSV format.
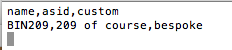
Note the first row contains column names. These are arbitrary and don’t have to match anything within K2. They will be used while configuring the import. Drag the saved text file directly into the Computers window of KeyConfigure. This will cause the import dialog to appear:

The “Default” import mapping only works when the column header line in the CSV file matches exactly with field names (custom or otherwise) of the computer records. In our example we must setup our own import mapping. Clicking the “New” button gives us this dialog with computer record field names on the left and the names from the first line of the CSV file displayed on the right.
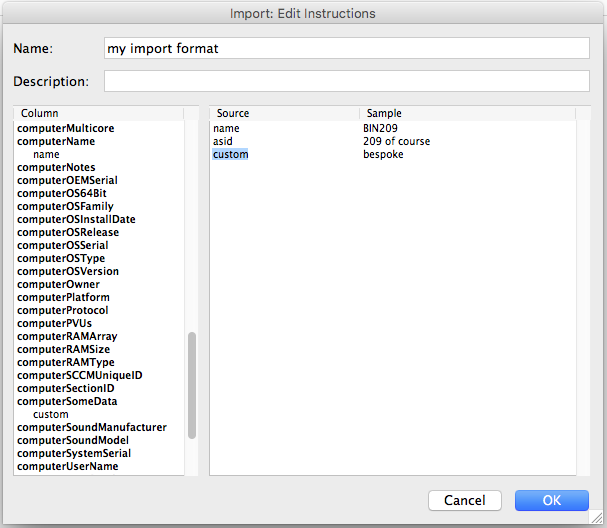
To configure the Import, we must drag each source column name listed on the right onto a destination field name on the left – then you will see the column name listed under the field name. In the screenshot above we’ve already done this – so you can see that “name” (from the CSV file) will be mapped to the computer record field “computerName”, and “custom” will be mapped to the custom field that we named “SomeData” – this field appears in the list as “computerSomeData”.
As each CSV data line is processed during import, a corresponding record must be matched in the Computers table. In the example above, the “computerName” field is used for the match. Note: this will only be a reliable match if computer names are unique! The import process can instead use computerID or computerMACAddress for the match – in which case, your CSV data would use one of these as the “key” value for the records to import. Note that in order to import matching only a MAC address, you should first ensure that this column is displayed in the Computers window.
After clicking OK in the field mapping dialog, our newly created “import instructions” will be listed as an alternative to the “default” choice. Select it and click OK to begin the import. We will see a “preview” of what is about to be imported from the first row of data in the CSV file.
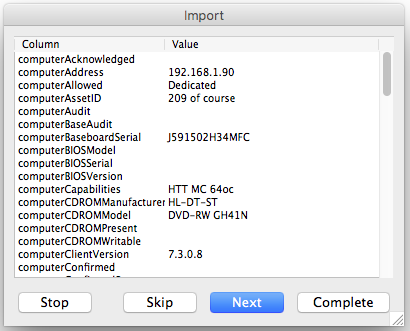
Notice here that the preview shows the merge of data that was already in K2 (which came automatically from KeyAccess), and the new data that we’re importing. In this dialog, each record can be inspected and then skipped or imported – or you can complete the import of all records without inspecting. After the import completes, we can look for the new data in the Computer Details window.
Note: if we import a record that does not match any record in the Computers table, a new Computer record will be created! In our case, the match field was computerName so without a match, a new record with the field “computerName” filled in will be created. The record ID for the new record will be built from the computerName field but prefixed with “C”. However – if a computer with this name later has KeyAccess installed and logs into KeyServer, it will not necessarily match up and join with the record created by import. New computer records created when a KeyAccess client first logs in will by default have an ID based on Mac address, not computer name so the import created record based on name will remain an orphan. You can configure clients to use an ID based on Computer name, in which case they would join to the imported record. Or, you can use different import data to create initial records with MAC address based ids. Caution should be taken when creating records from import (as opposed to adding data to existing records). If you need help with this, contact our tech support.

Subscribe
Subscribe:
Follow:


 See K2 First-hand:
Follow: