Web UI Extras
Multiple plugins extend functionality in the Web UI
The web interface offers an ever expanding library of add on "applets" that extend functionality beyond the tools in KeyConfigure. This page details the current offerings and describes their functionality.
All of these plugins are included in the AllSight tier of the product. You simply need to activate the ones you want to use in the Settings of the Web UI under Extras. Check off the ones you wish to have available, and the Extras main navigation item will appear on a browser refresh. The Extras page has a widget style dashboard much like the One Click Reports. In fact, you can add these Extras widgets to your own Dashboard just as with one click Reports.
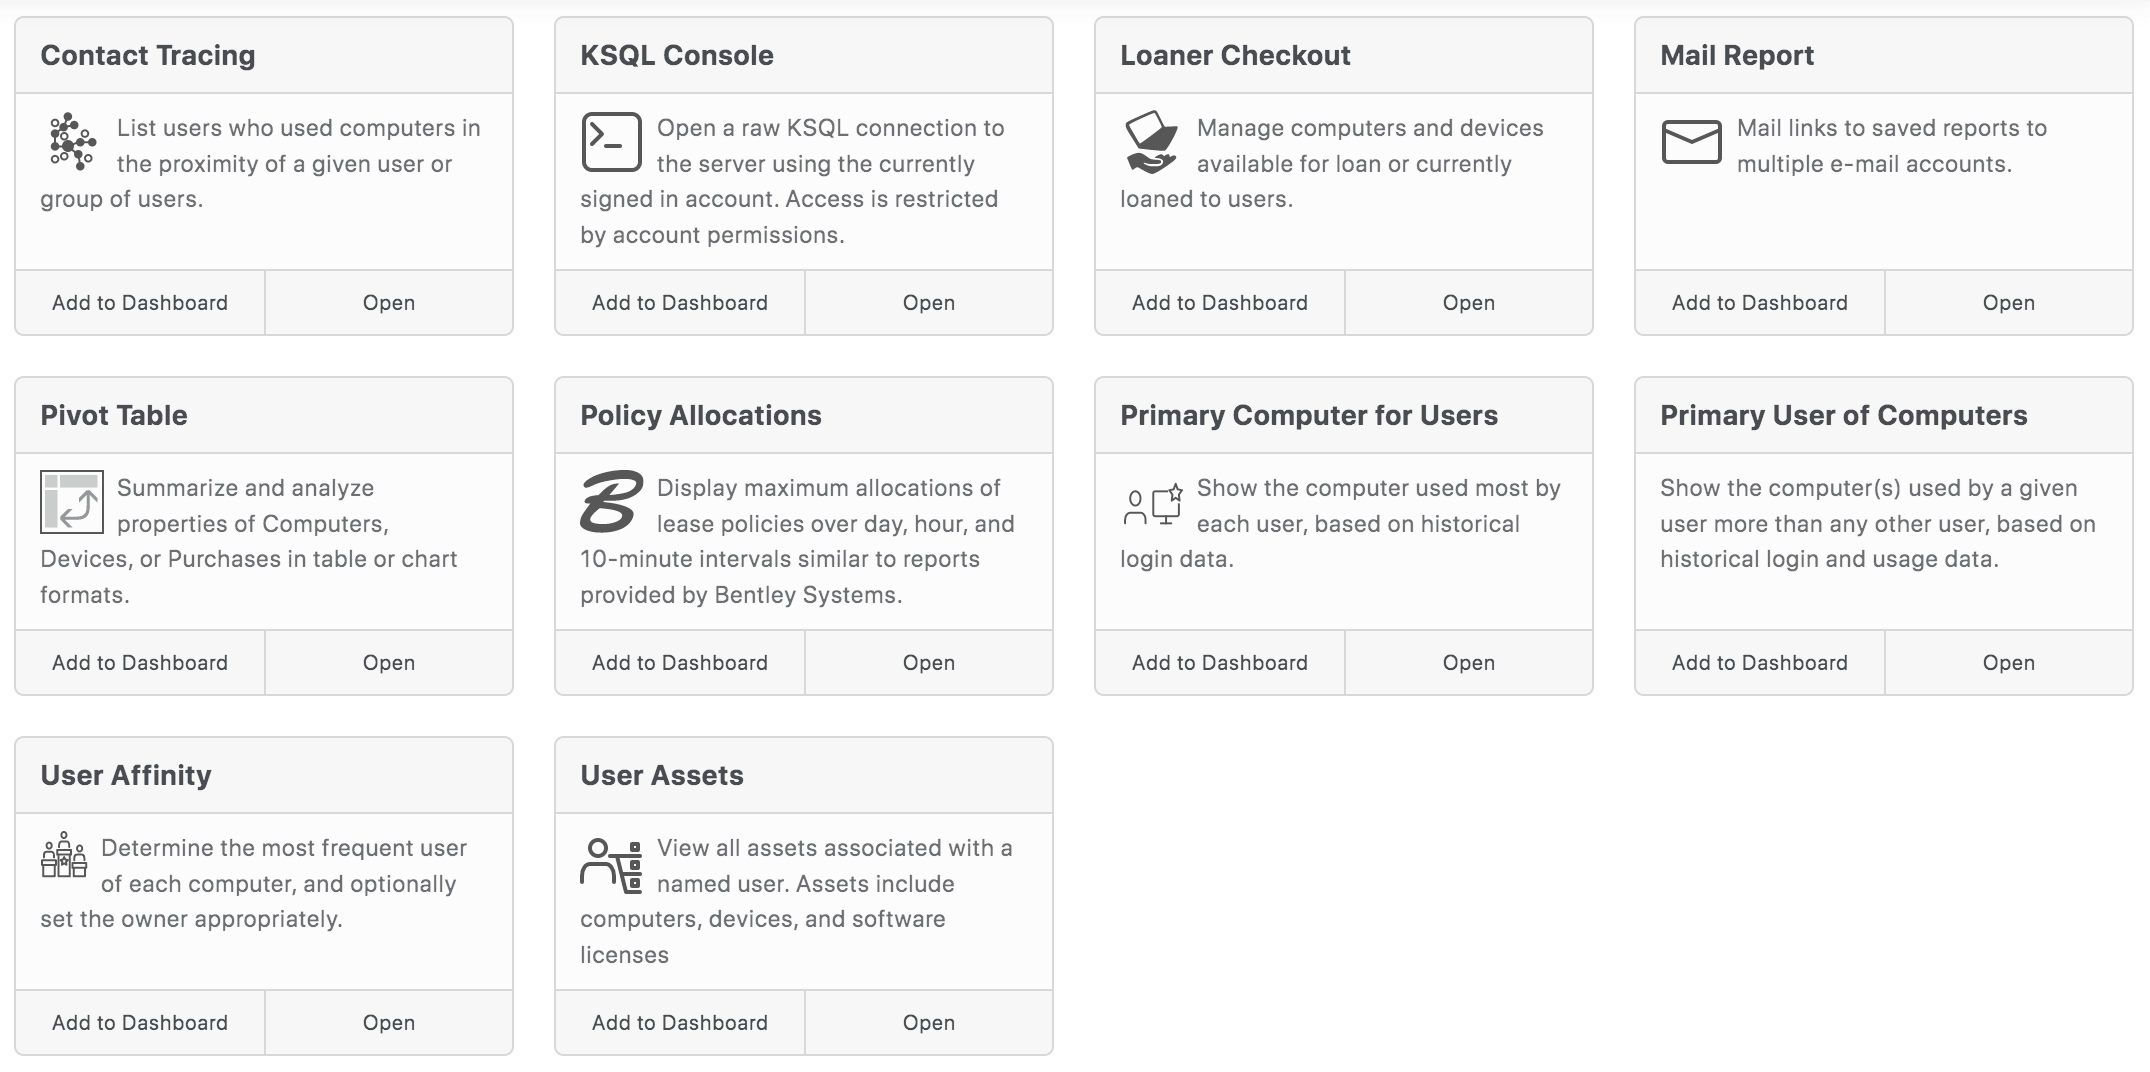
Contact Tracing

The usage data collected by session logins/logouts in conjunction with computers being organized into room based Divisions allows for contact tracing to occur. We hope you never need to use this Extra, but if needed it is available. Simply choose a User Name and set the Date Range of contact analysis. You can also alter the threshold of contact overlap time, as well as narrow to a given location if needed. The results of the trace will show every other user that was in the same location as the user and for how long, based on the computer session events.

Hardware Replacement
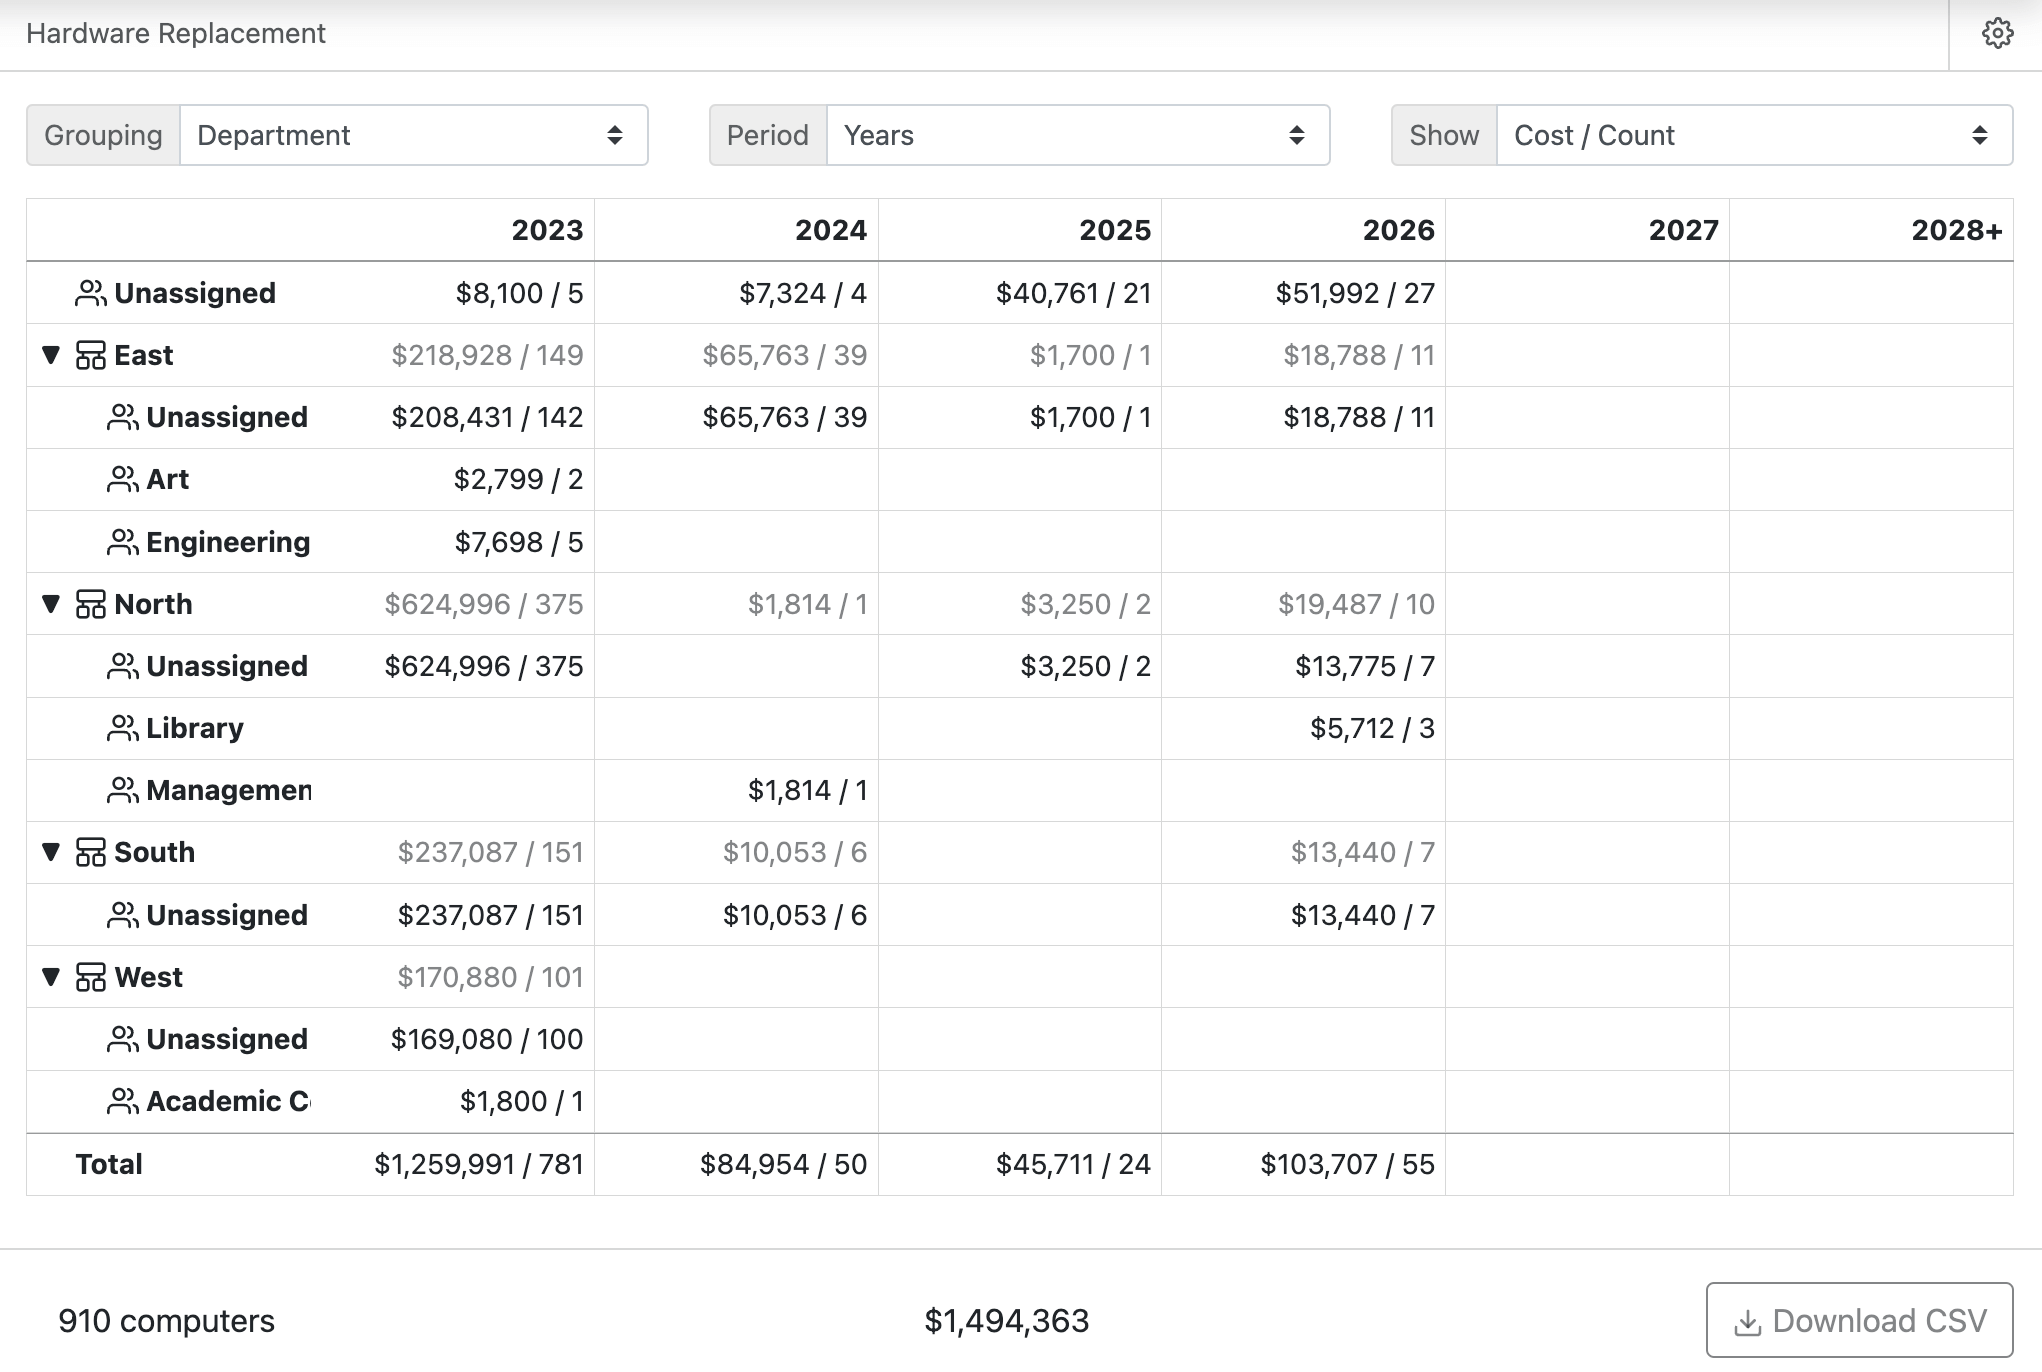
This extra allows you to plan and execute multiple functions of a hardware replacement plan. The landing page is an overview of all Computers (devices not included at time of release) in a pivot table view based on the chosen criteria. Initially it is likely that this overview will not be encouraging if you have not filled in any of the data it uses to calculate the costs per year per area. By navigating through the extra and setting these values, you achieve a projection of cost per year per grouping to help ensure accurate budget planning.
The first pull down is for the Grouping you want to view by on the left side. Department is likely a popular choice, but it depends on that field being populated in all records. Because of that, Division may be a starting point if you have your computers well organized but not fully asset managed. More advanced options include the Managed By asset field, or the Current Model. The latter will make more sense as you become familiar with this feature set.
Your next choice is the Period to group replacement dates by in the horizontal headers. Years is probably the most popular, but some organizations may find Months or Quarters more applicable. You can use the < > keyboard keys to add or subtract columns from the table.
The last choice is what totals you want to show in each cell of the table. You can choose Cost, Count, or both.
Once you have selected the choices you want, you can begin the process of reviewing each group/period break down and making changes to Computers to have them properly reflect in the table based on replacement date and cost information. You can also download a CSV of the table. Note that like all other components of the platfrom, this extra obeys permissions. As such, a user with rights to see Extras, but only see their Computers and not others, would only see their resulting information instead of the entire organization.
Clicking the gear in the upper right allows for setting some baseline assumptions and workflow automations.
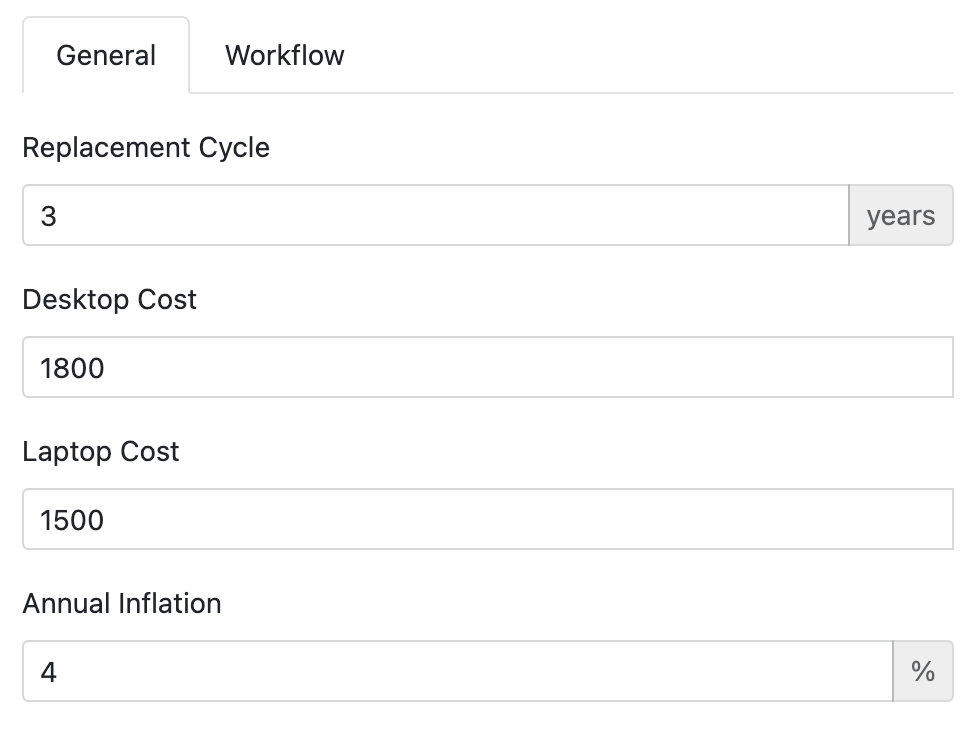
The General options for Desktop and Laptop cost create a baseline in the absence of anything more specific at the Computer record level. That is, if you have not linked a Computer to a Model, or set the Replacement Cost of the Computer specifically, the above setting will be used as a fallback. You can also set an Inflation rate to be figured into future year projections. This is added onto the base cost specified at any of the noted levels.
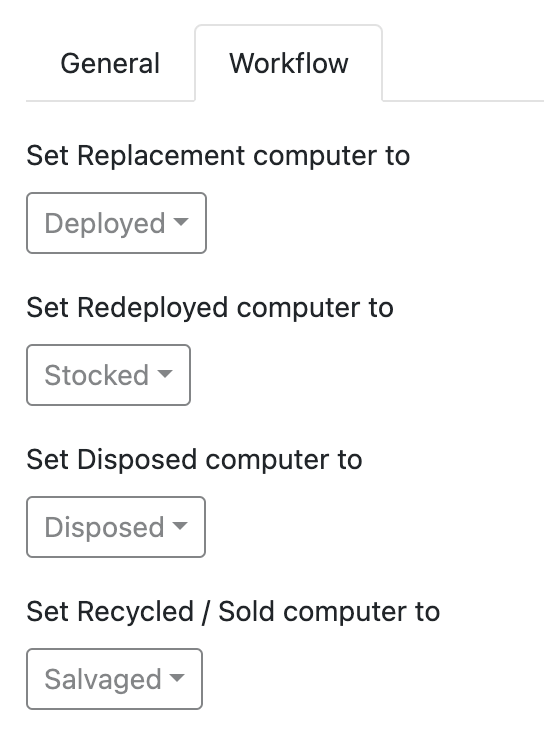
The Workflow options specify what Lifecycle Stage a Computer will become when you commit the replacement (see below for more on that).
Model Breakdown
From the main table, you can then click on either a Group on the left, a Period across the top, or a Cell in the table. Clicking a cell or group will take you to a list of individual computers and their replacement information. Clicking on a Period will take you to a sub table view where you can see the Models across the top for that period of time. That is, for say a given year, you see every department and the total costs/counts per Model.

Computer List
As mentioned you can view a computer list for an entire Group across all time, or a more focused list for just one time Period for the Group by clicking on a single Cell in the table. This list page has a lot of information on it. The toggle in the upper right allows for a more collapsed view if you're trying to get a better overview without quite all the details.
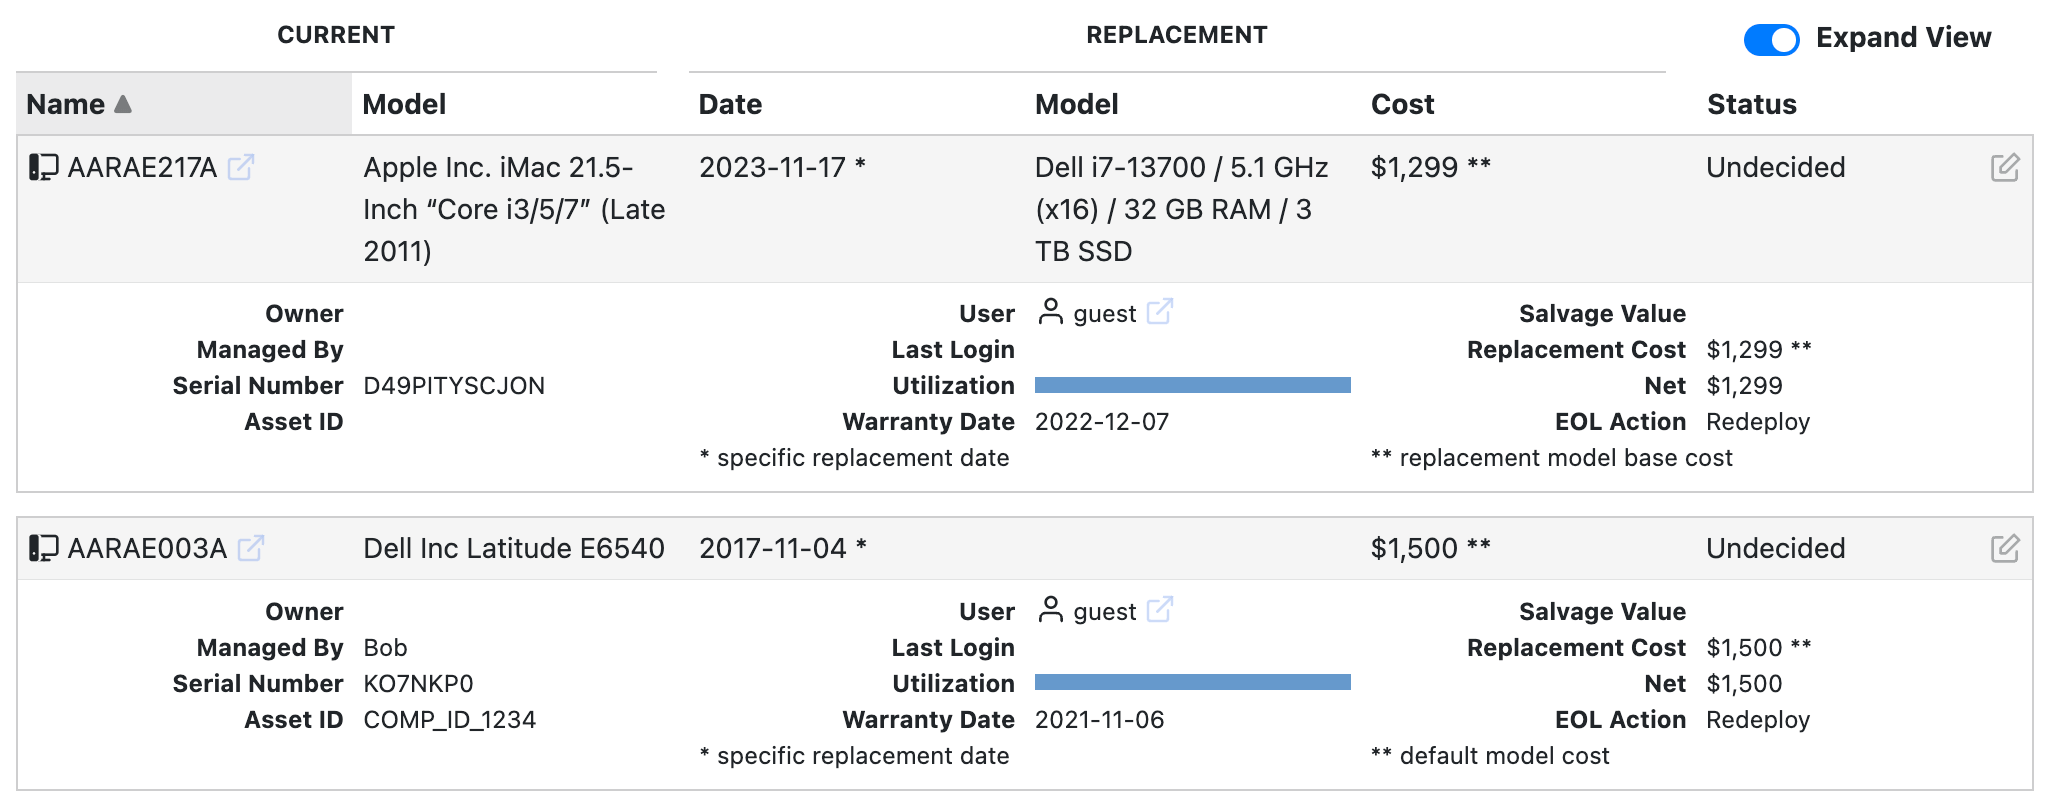
Each box has the details of one computer, its current model, replacement date, model and cost, and status. The details that are expanded are to help with the decision making of authorizing the replacement or changing it. The User/Owner could be relevant based on job duties. The Utilization indicator could prompt a more or less powerful replacement, or opting not to replace at all. Note the footnote items that indicate where the Date and Cost come from for each computer. As mentioned above, these may be baselines, inherited from the linked Model, or explicitly set in the Computer record. These help inform how closely reviewed the record is, and how accurate the cost estimate is.
Notice that there are links for the Computer and the User. These will open those records in a new browser tab. The User link is a convenience if that record has more details of use in your environment (possibly by way of one of our scripts that would import meta data from AD). The Computer link is useful for reviewing other details and changing the relevant fields on the Purchases pane (replacement date, model, and cost). The last button of note is the Edit in the upper right of each box. This opens up the workflow page for that computer and its replacement.
Replacement Workflow
The replacement workflow window has 5 steps and 2 columns. The Current computer information is on the left, and the Replacement Model and/or Computer information is on the right.
Step One
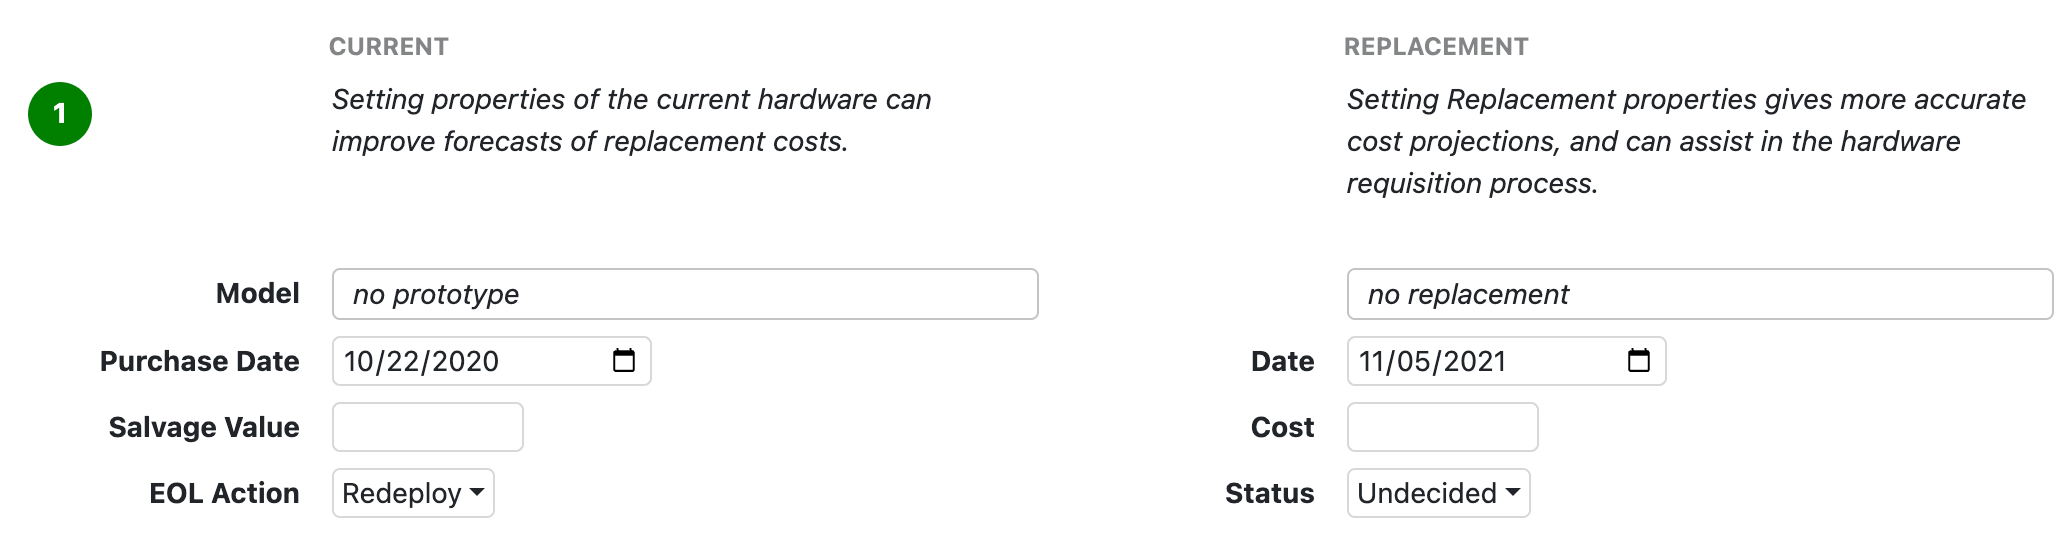
You can choose the original model of the current computer if you like, as well as verify the Purchase Date. You can set the Salvage value if relevant to your processes. This will be used to calculate a final cost assuming sale of the system by subtracting salvage from cost. The EOL Action allows you to set what is happening to the computer once it's replaced. These options include Redeployment, Resale, Recycling, or just Disposal.
For the Replacement, choose the Model that will be used, and again verify the Date and Cost of replacement. The Status is to Accept, Reject, or opt out of the replacement action.
Step Two

This step is about confirming the system being replaced, and choosing the new computer record to replace it with. This step is for when you have a new record for the new computer. Presumably this means the Model specified in step one has been purchased and you have at least pre-staged the computer record, or it has arrived and already has the KeyAccess agent installed and a full record has been populated. Once you choose the replacement computer, the same basic stats are shown as for the Current, so you can again verify the correlation is appropriate.
Step Three
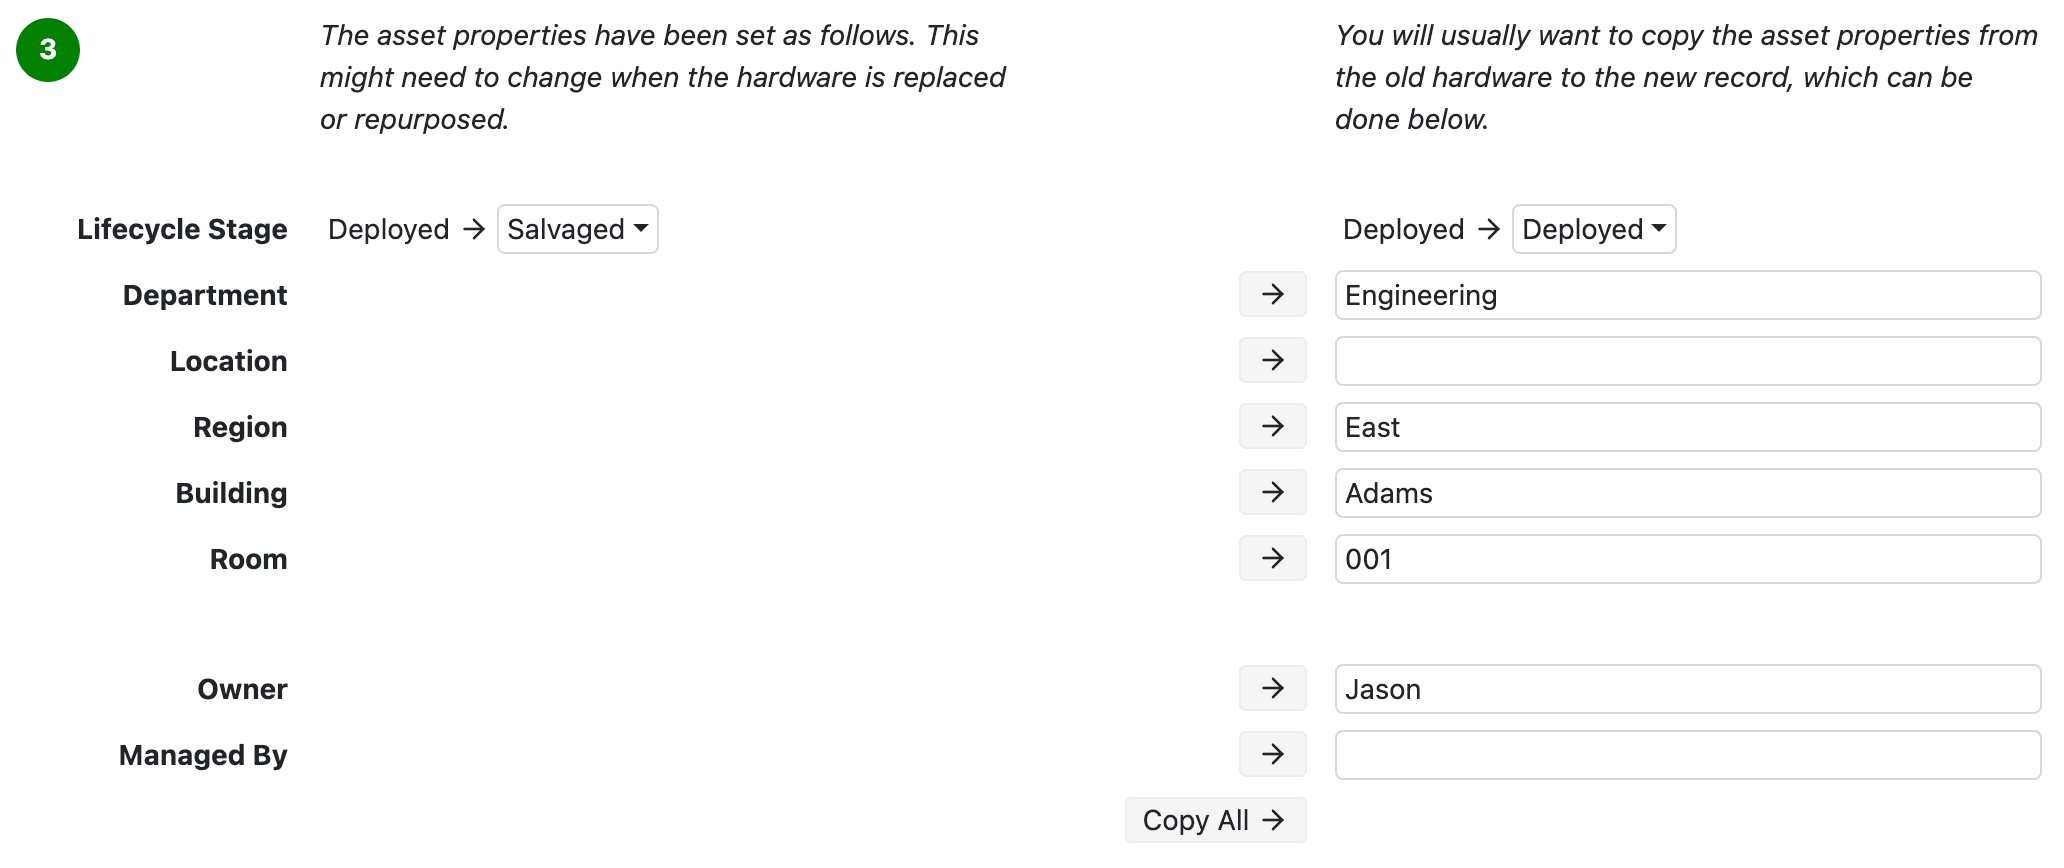
Because it's likely in a replacement several Asset management fields will need to be the same as for the old computer, this step helps automate that process. You can verify the Lifecycle changes for both the current and new computer, and copy some or all of the asset field values to the new record. If you previously did not have these asset details in the old record, it's an opportunity to specify them for the new computer.
Step Four
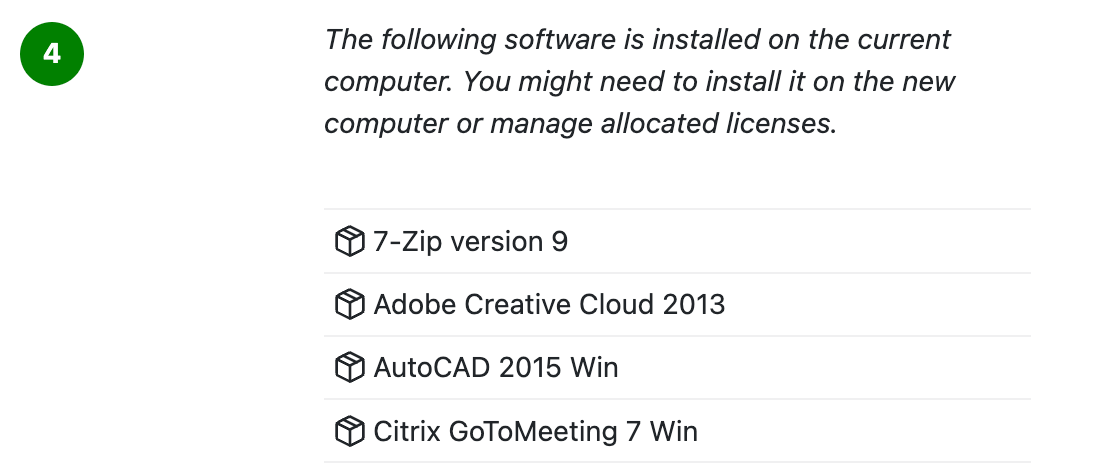
Review the list of Software on the current computer to ensure all Products have been added to the Replacement as appropriate.
Step Five

Time to Commit the replacement! This step only shows once a replacement computer record has been selected in step 2. Clicking the commit button will make all the above changes to both records. You can also choose to attach a text file copy of the changes to either or both computer records in their Documents storage.
Wrap Up
As you commit changes to individual computer replacements, the list view updates accordingly. This relates to Status of the replacements, as well as the final cost calculations. And of course this is all reflected on the main table views.
Note that once computers are moved to the Salvaged, Retired, or Disposed lifecycle stages, they are NOT part of this extra anymore. Those records are ignored as they have already been removed from service and therefore do not need replacement. This means that once you commit a replacement and the original computer lifecycle changes, it drops out of the extra because it's "done" being replaced.
Note also that virtual computer records are not shown in the extra as there is no real meaning to replacing them as compared to a host they run on.
KSQL Console
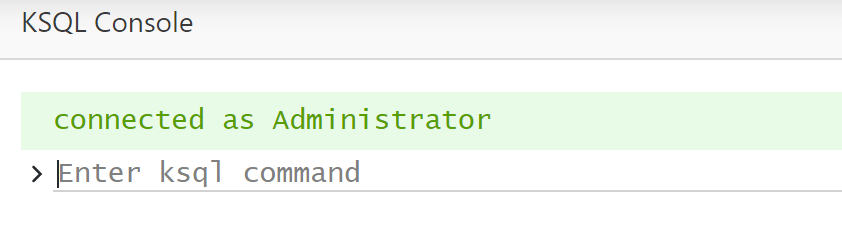
Primarily used for troubleshooting or those who dive deep into the data structure for custom purposes. This allows you to direct query the server database with sql style commands. It is highly recommended this only be used after consulting with Sassafras Software Support for assistance and direction. Type "help" to get a full list of available commands. Syntax becomes complex so again please consult with Support for your use case.
Loaner Checkout
This Extra is designed to assist in processing and tracking loaner equipment, be it Computers or other Devices. While each record detail has a field for loan person and return date, this Extra offers a number of enhancements to that simple idea. You can view all available systems marked as being for loan, see what is available and checked out, view return date information, process mass checkouts, send email confirmations to the user, and more.

Before using this Extra, you need to configure it using the gear in the upper right. There are several tabs of configuration options to consider.
Settings
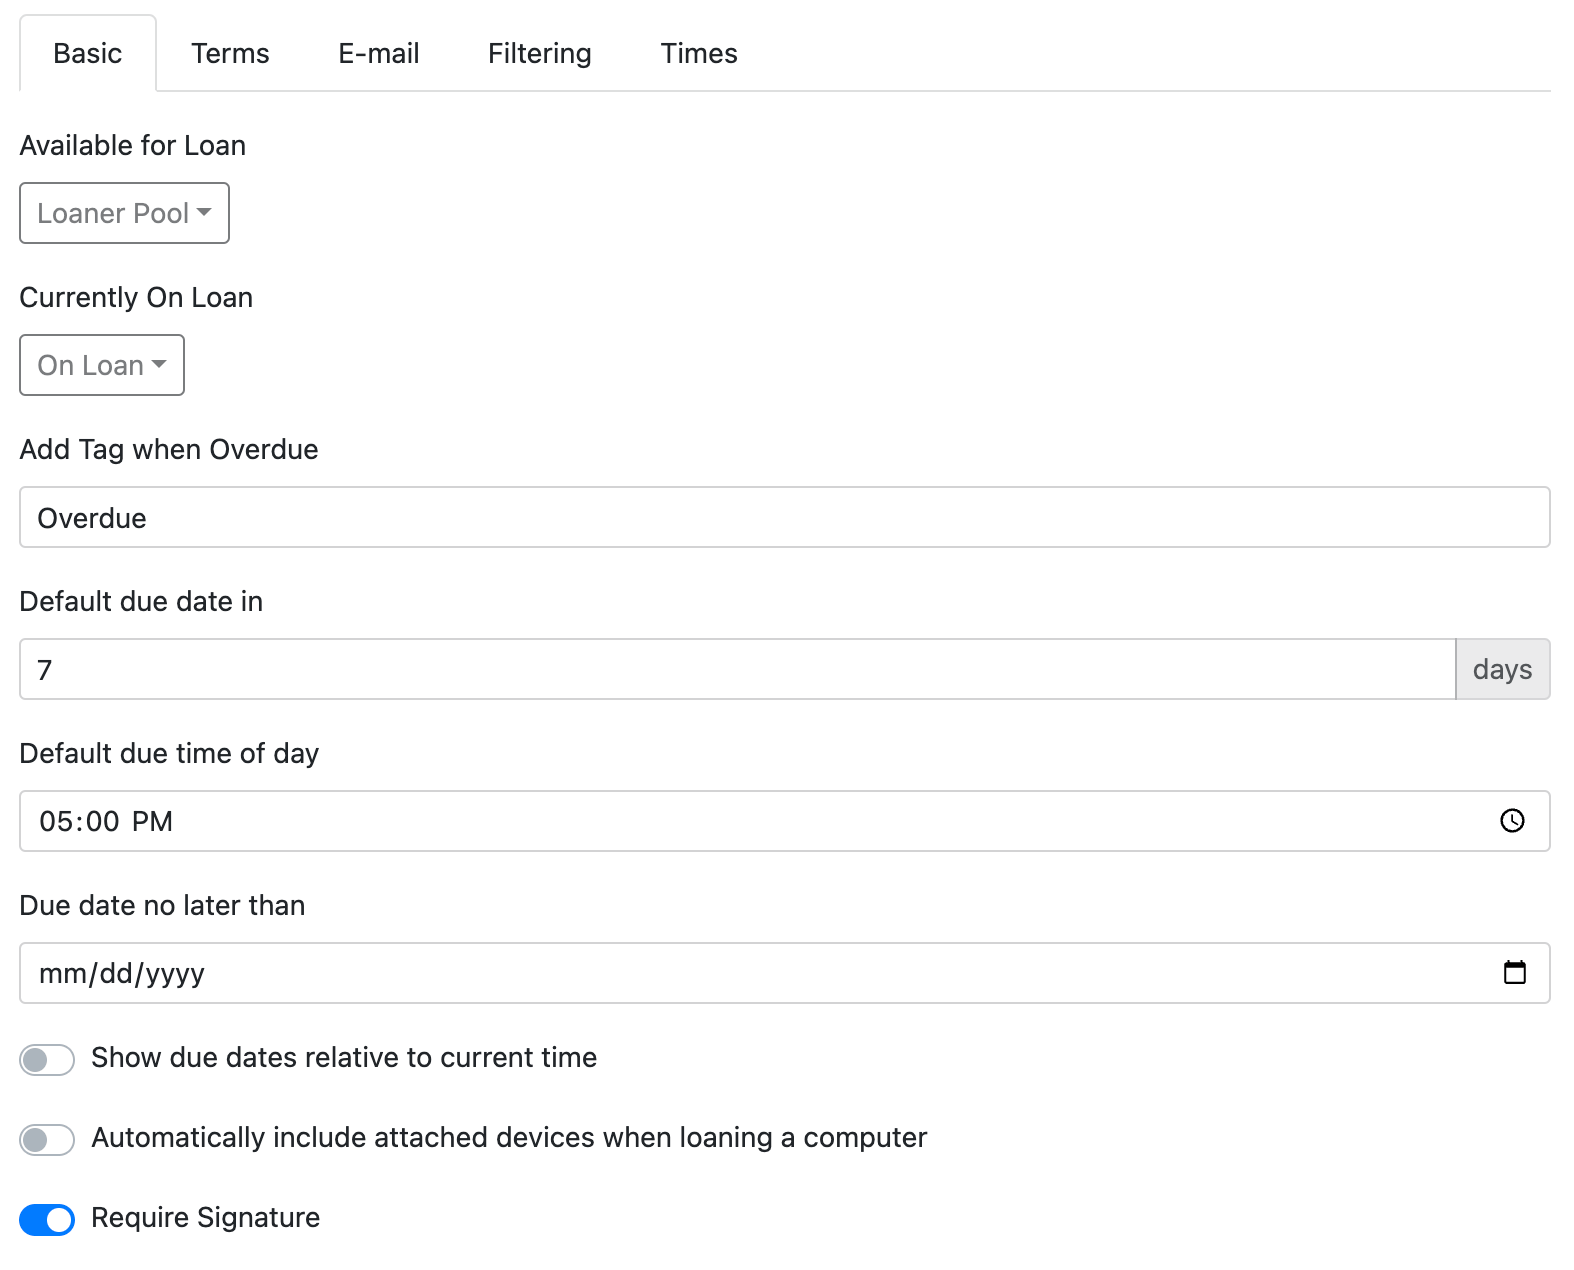
Basic settings include what Lifecycle stage should be used for Available and On Loan conditions. Note you may be interested in using Custom Values for these, and/or optionally use the Filters below. These lifecycle choices dictate what shows for Available and On Loan in the extra, and will automatically be changed between when you issue and return hardware.
You can choose to have a Tag automatically added to the asset record if the due date passes without it being processed for return.
There are then several settings for the Default due in number of days, default time of day due, and a maximum due date (e.g. end of semester regardless of default days).
If you have "bundles" of equipment, the option to Include attached Devices when loaning a computer is very useful. That is, say you have a camera, tripod, webcam, sanner, etc. all linked to a computer that is marked available to loan. This option effectively makes all the linked devices part of the loaner bundle so you don't have to select them individually in the process.
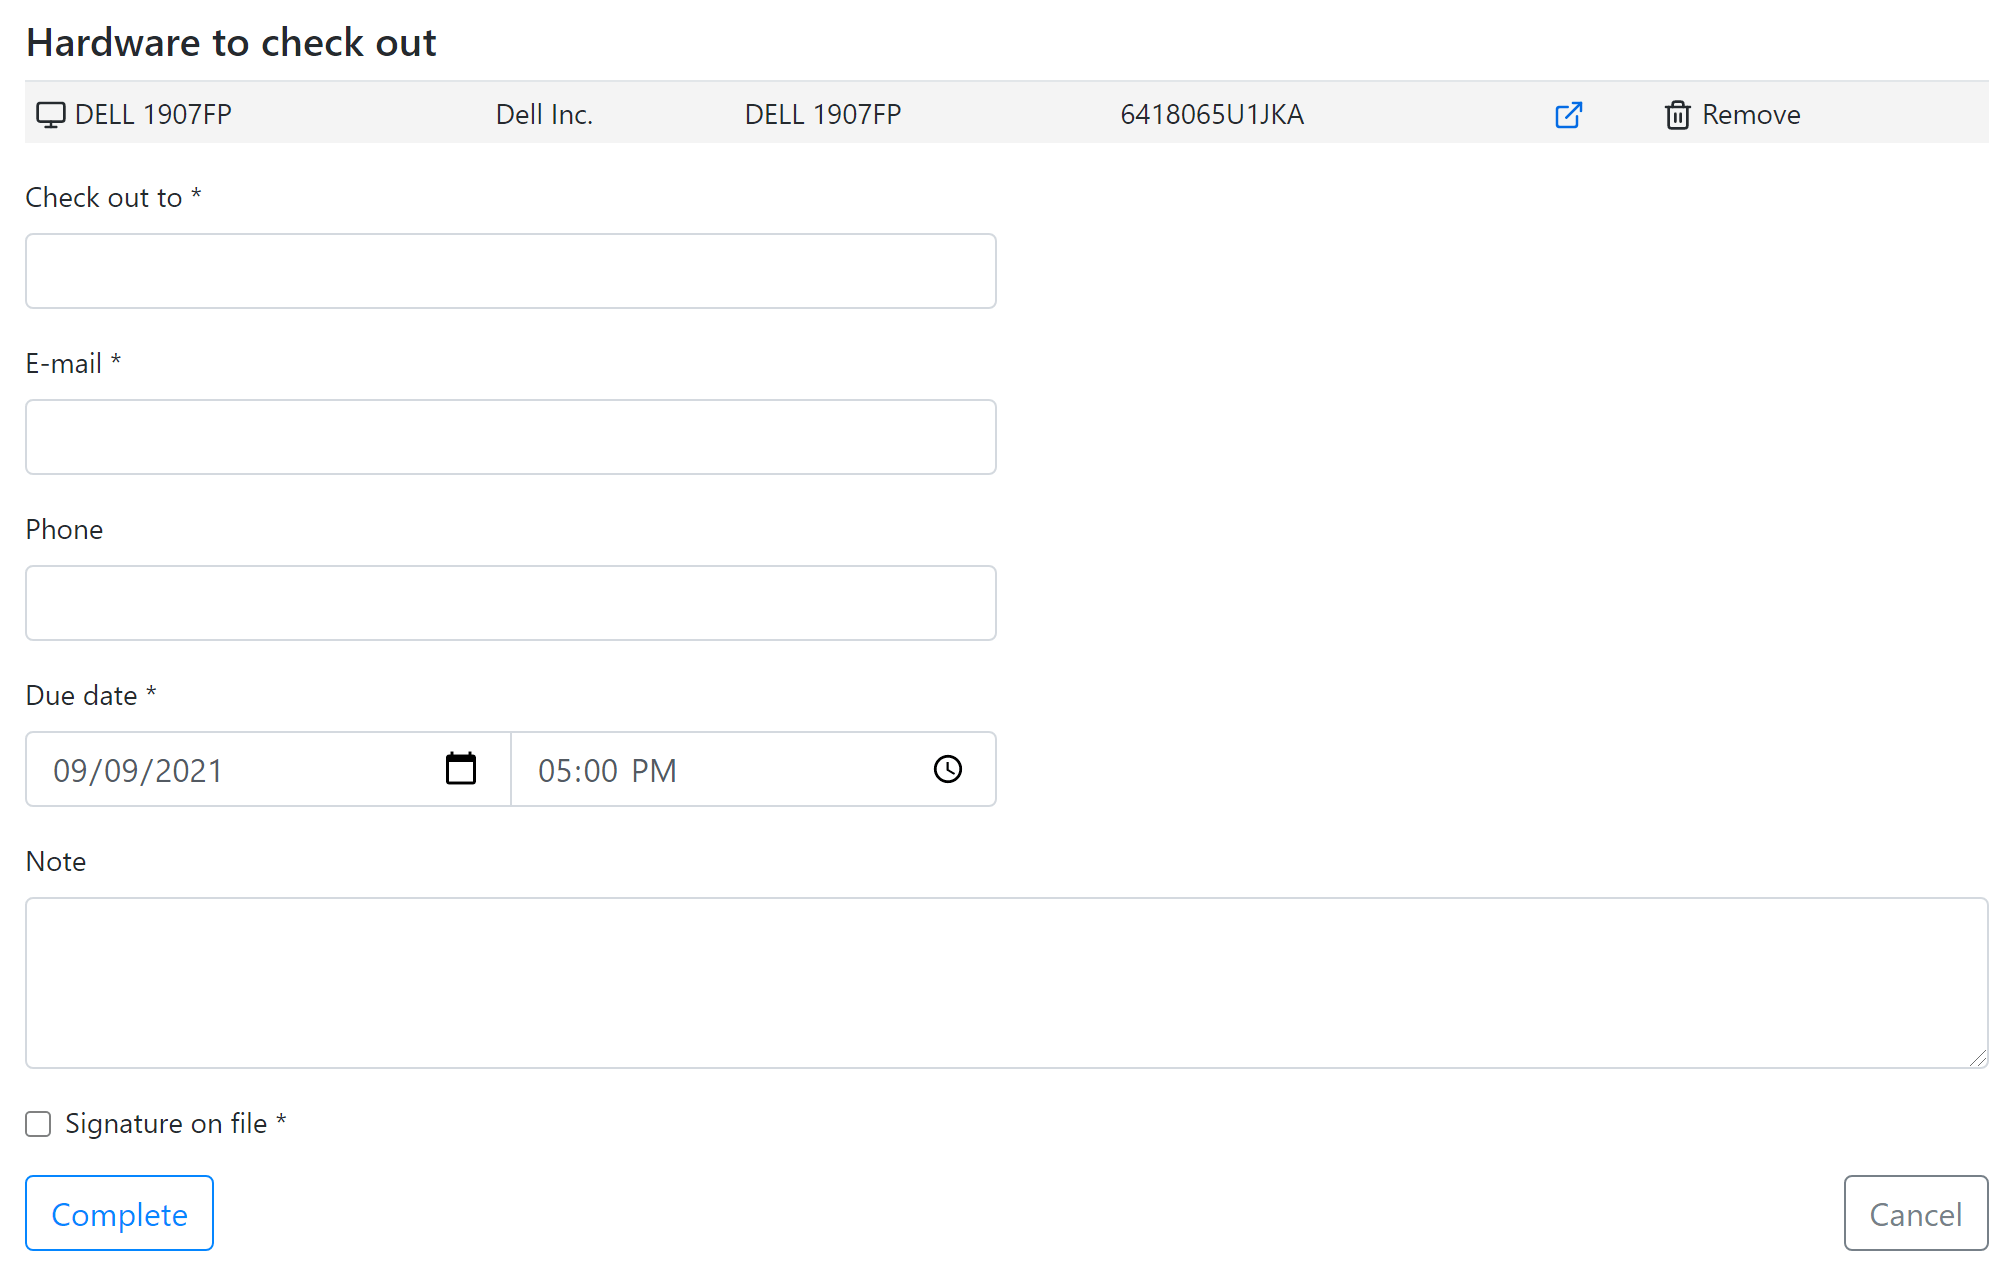
Lastly you can set if a Signature is Required when performing the checkout.
Terms
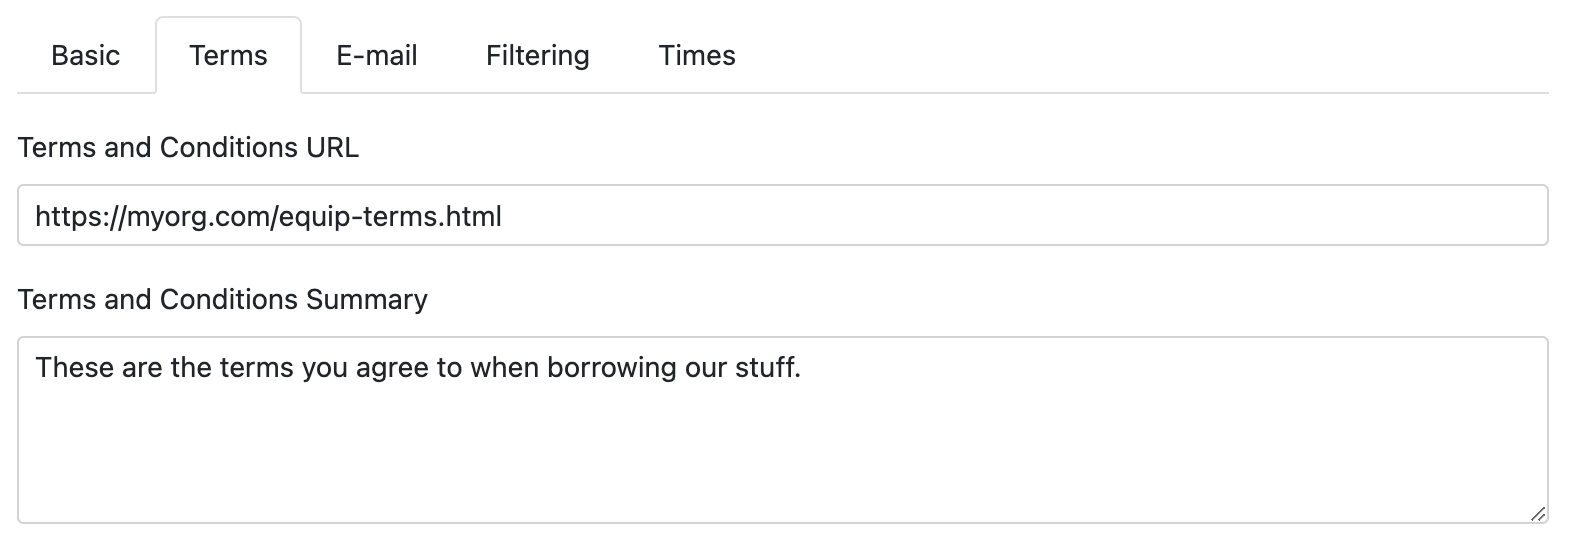
The Terms tab can be used to link to custom T&C on another site, and/or include a summary. These are used as part of the confirmation email and receipt functions below.
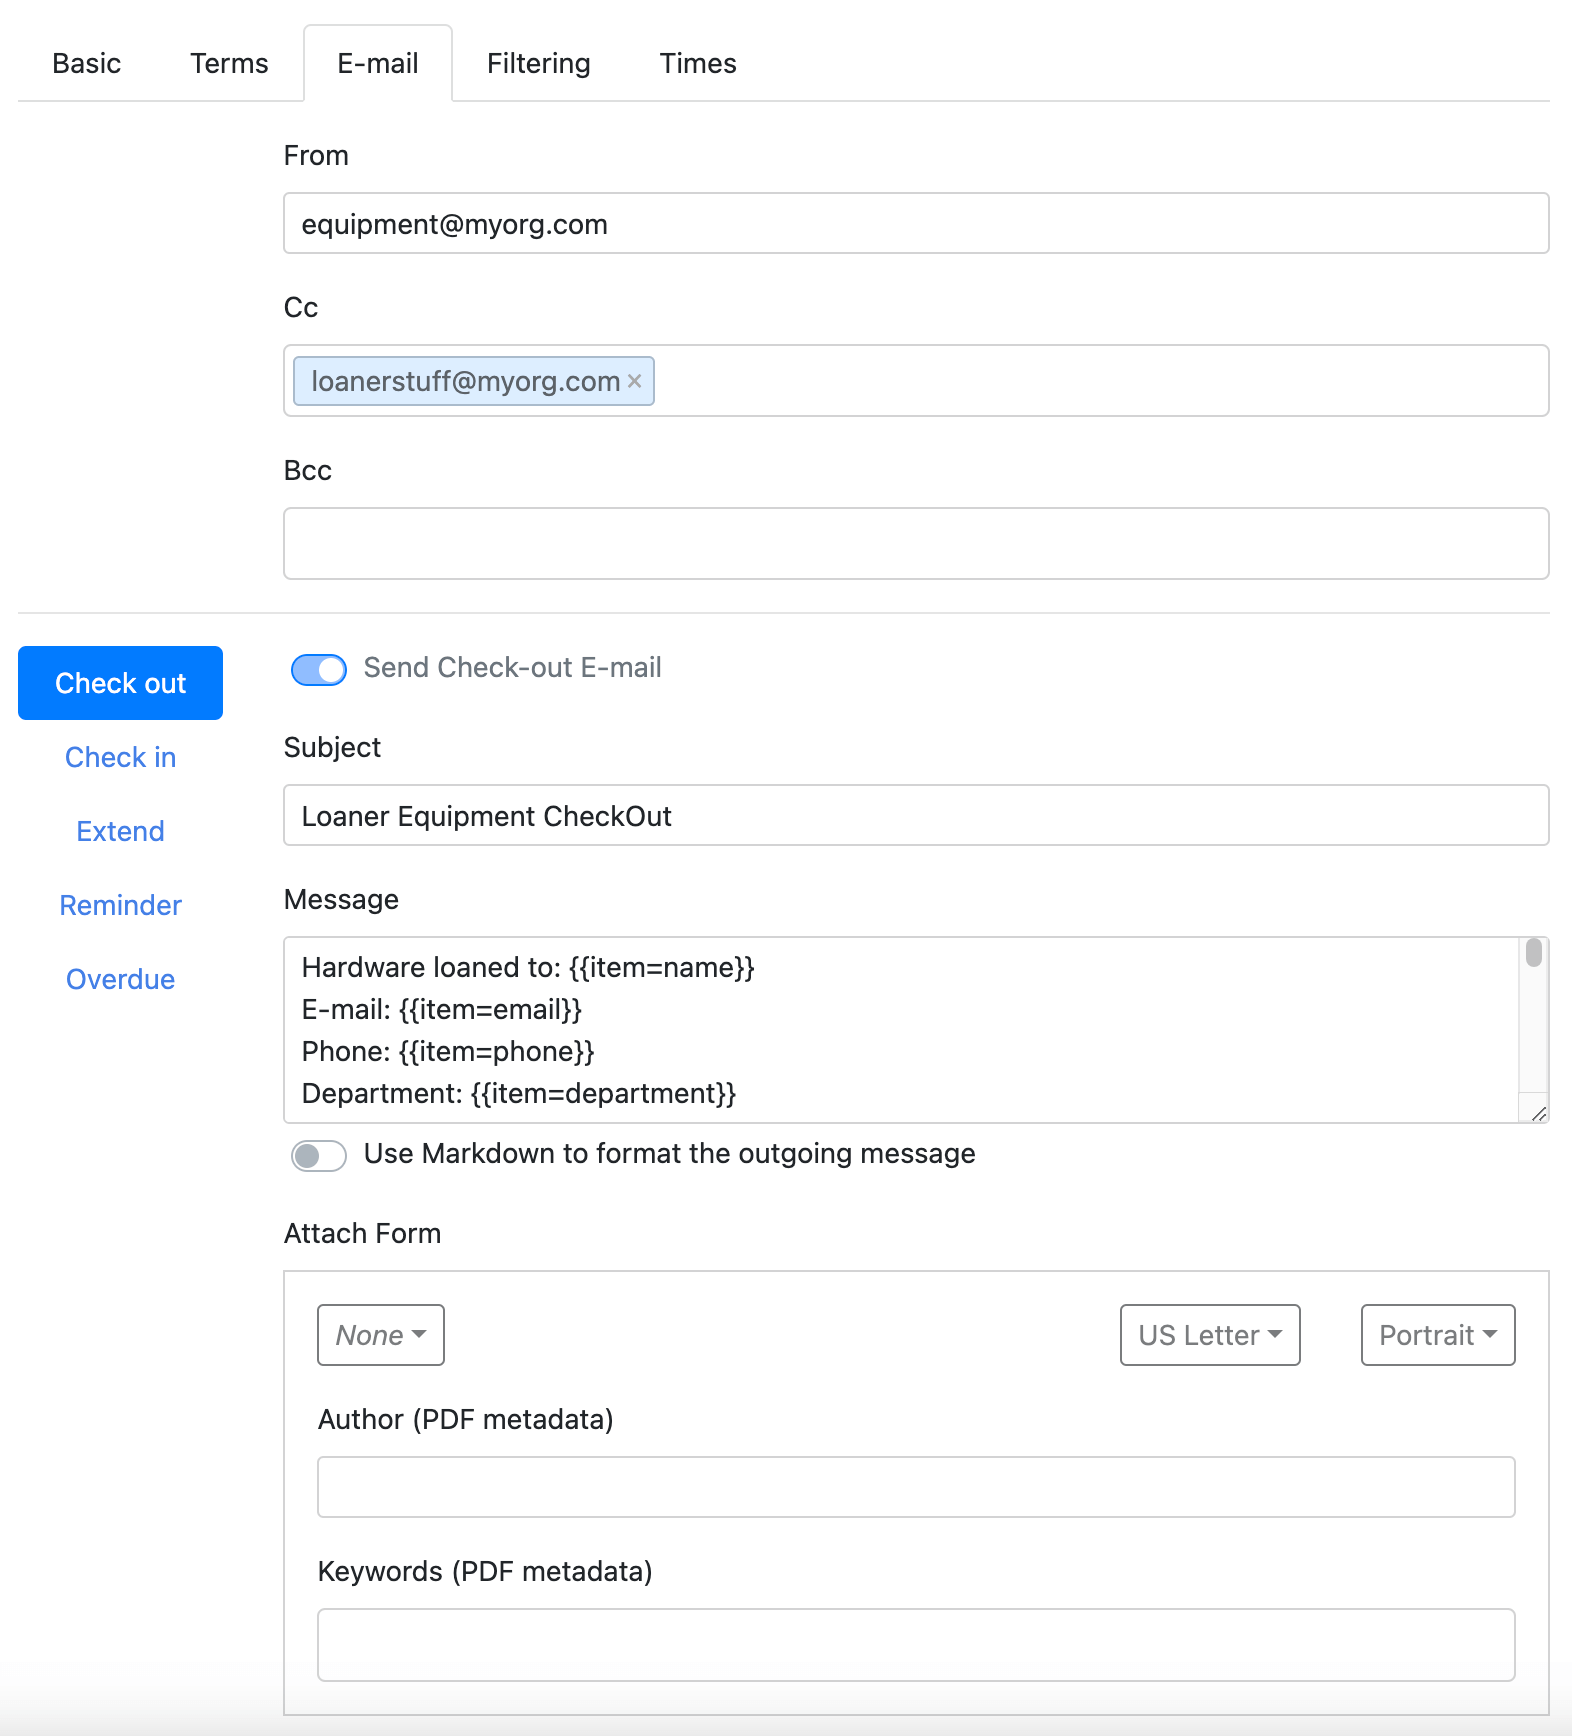
For confirmation and reminder E-mails you can set a number of options. This includes a full macro enabled editor and ability to customize the template for each email type. The default templates include a lot of common example macros to get you started.
You can also choose to attach a Form to the email. This will not only provide a PDF of a custom Form that can contain any text and asset detail as desired, but also include the Signature of the person borrowing the equipment (as entered in the checkout process). This can only be a User form, other types will not be listed in the drop down.
Filtering
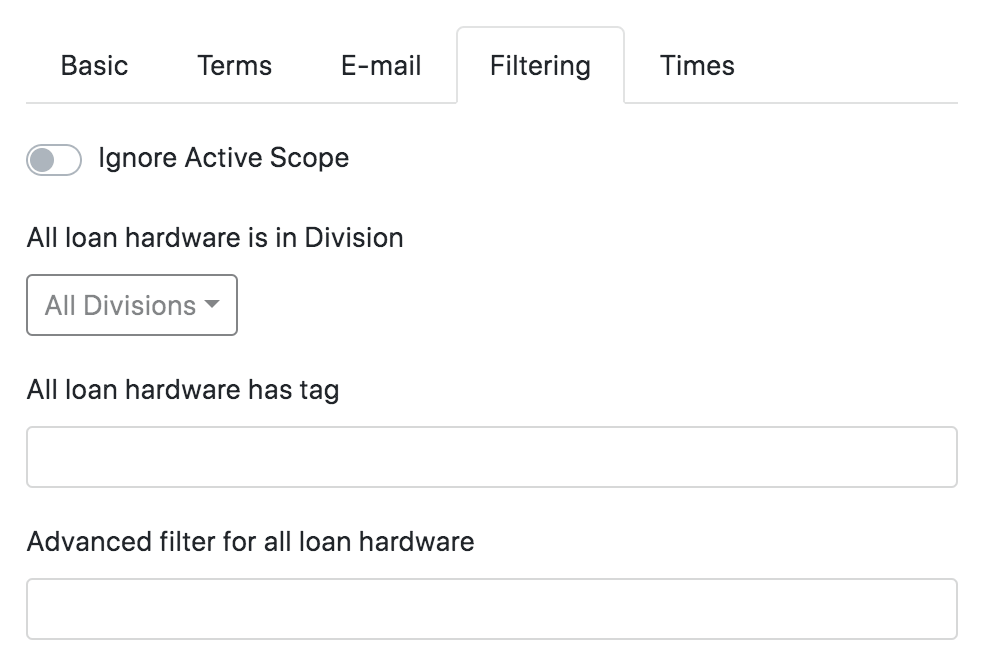
When using the default lifecycle stages, you may want to Filter which items are actually used for loaners. You can do this by Divisions as well as Tags, as well as an advanced Filter. Use of these options is largely dependent on if you are doing organization wide loaners that are segmented by department access rights by Sections, or if only one department in a large organization is using this feature.
Times
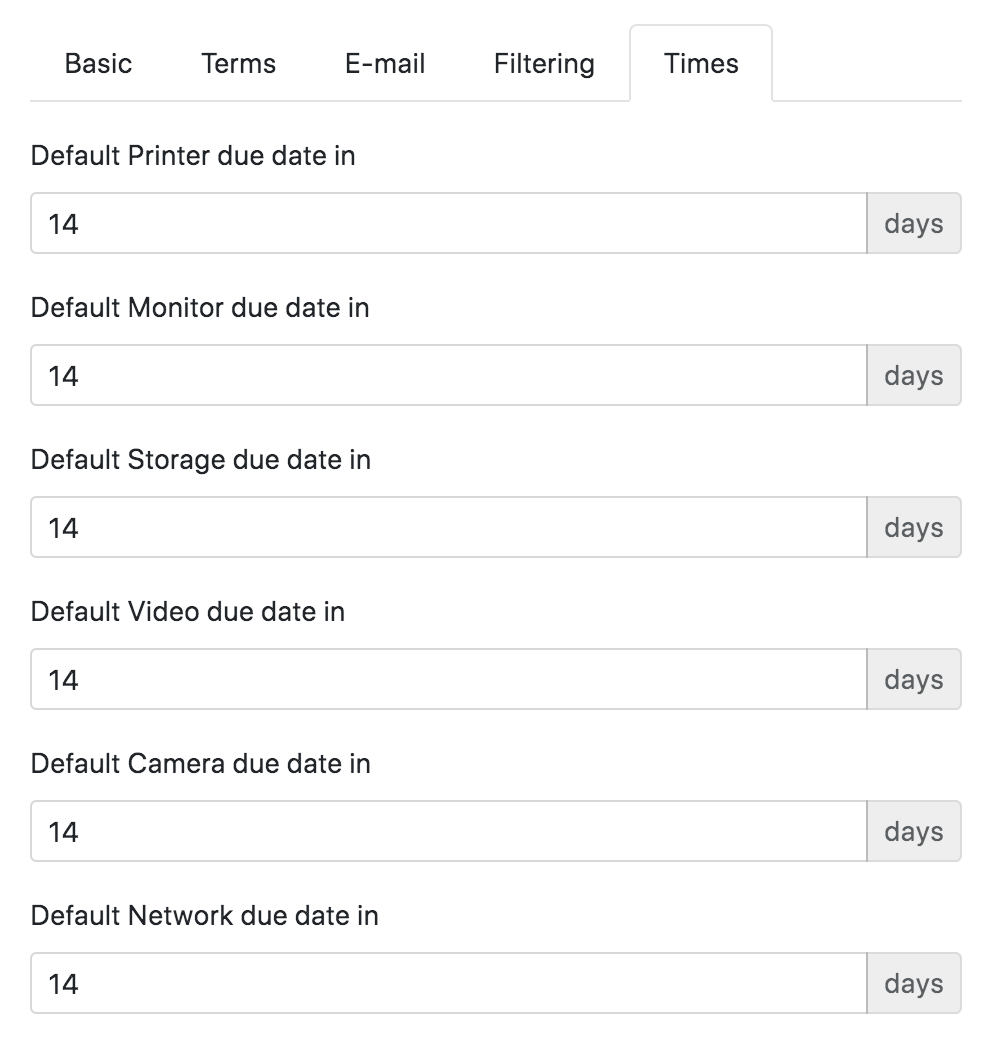
If you want to set individual default due days by device Category, you can do so on this tab. These override the Basic setting for due time, so computers and each device type can all be different as a result.
Loaner Process
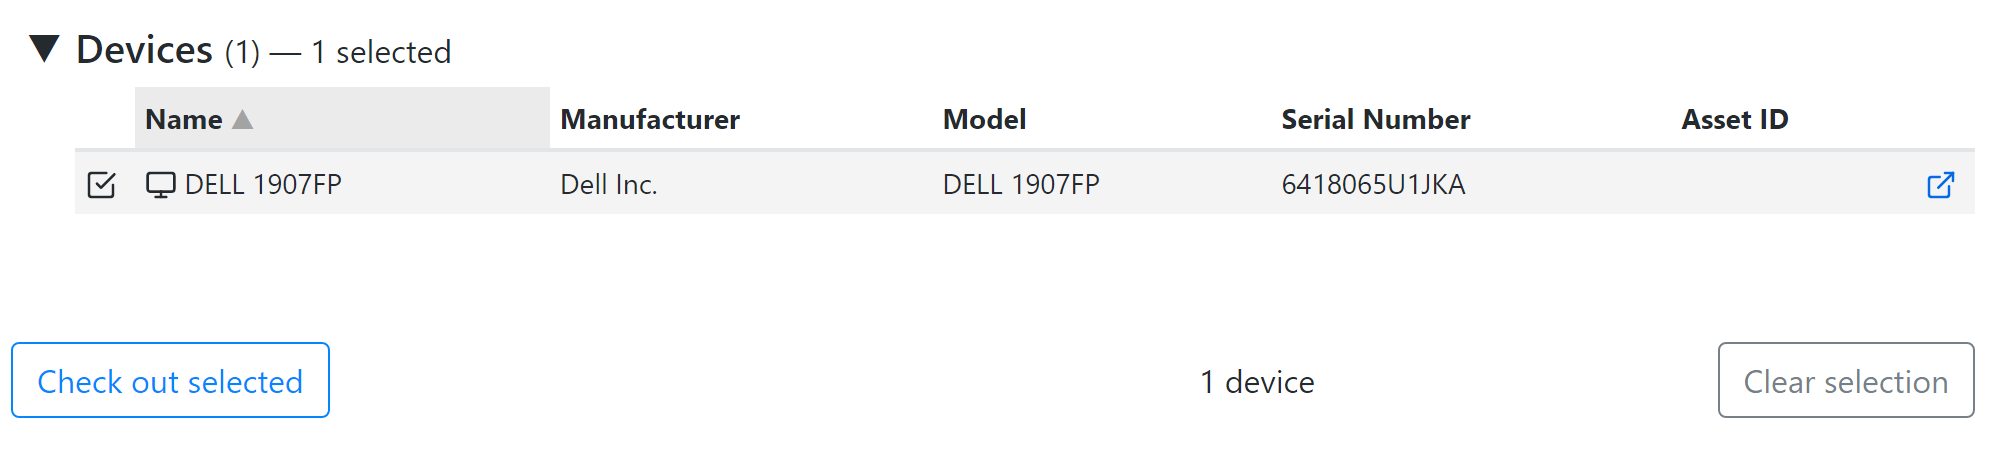
Once you have set up the configuration options, the big buttons on the main screen reflect how many Computers and Devices are available for or currently on loan. Clicking one of these buttons will show a list of the relevant objects. For Available items, you can then check off one or more that you want to loan out, and click the Check Out button to start the process.
On the Check Out screen you can fill out who you are loaning the items to and when they are due back. Note the User field does a lookup in the Users table so you can select a person by their previously seen ID per their Computer logins. This will fill in the relevant fields in the Details of each computer/device. A confirmation E-mail will be sent to the address specified, and you can put in a Phone number and Notes as desired for record keeping. Note that if you select a User based on the search and enter email and phone information, those items will be written back to the User record as well.
Once you complete the checkout you will be shown a summary screen where you can Print the "receipt". You can also check on items assigned to a user by Loan or as the assigned Owner using the User Assets Extra detailed below.
Mail Report

This extra is a very simple utility for emailing completed reports to users. Simply select the desired report from the list, put in a recipient, and click Send. The user will receive an email with a link to view the report in the Web UI.
Pivot Table
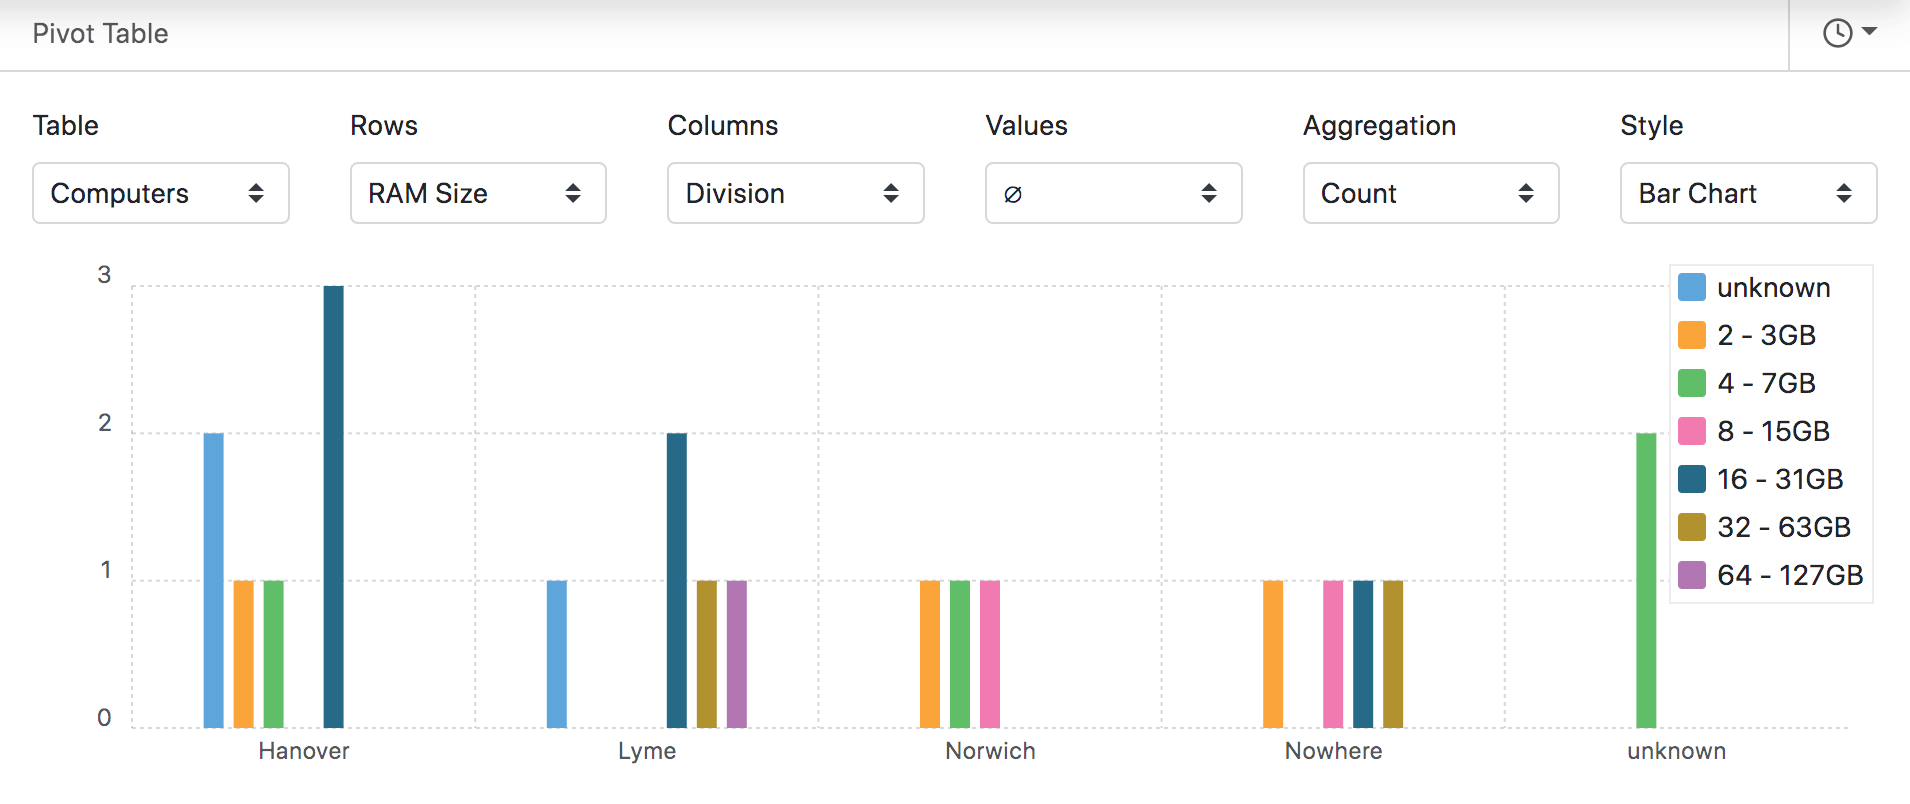
Pivot Tables allow you to choose different parameters to visualize data by groupings. You can choose from Computers, Devices, or Purchases as your data source Table. We implement standard pivot table options and will not fully document the topic of pivot tables here. We will however offer a few simple thoughts for those not versed in them.
Choose fields for Rows (what data do you want to see) and Columns (how to group the data). Values is set to "theta" by default meaning it's not used, and the results of setting this depend on your aggregation choice. For simple count, choosing something here will only show results in the table for items that contain a value in that field. Aggregation by default is set to Count and in simple cases should stay that way. Advanced data analysts may have use for the other options. For Style the simple choices are Bar Chart or Table depending on if you want a graphic or raw numbers.
See also our Blog Post on this extra.
Policy Allocations

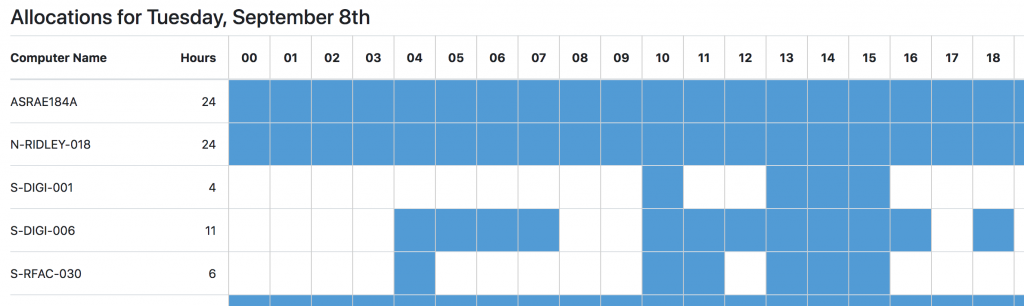
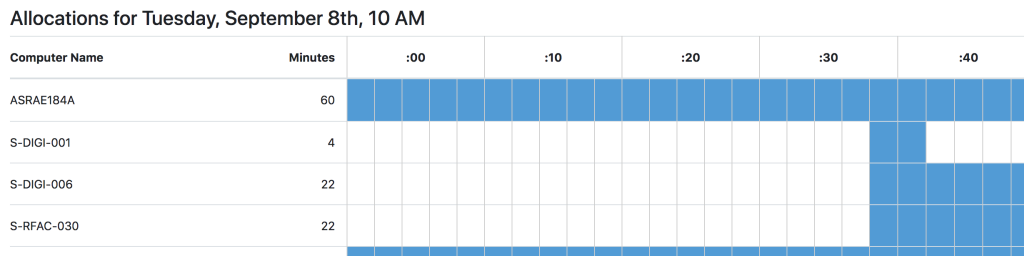
Originally created to assist users of Bentley products with detailed usage charts, this can be useful to anyone with Node, Leased, User, or User Leased policies who wants more detailed visualisation of Usage. Simply chose a year, month, and Policy. Only compatible policies will be listed when using the Search bar. Once selected the Extra will gather data and show results for the month. You can then click on a Day and show details for that day, and in turn click on an hour and see details for that hour.

Primary Computer for Users
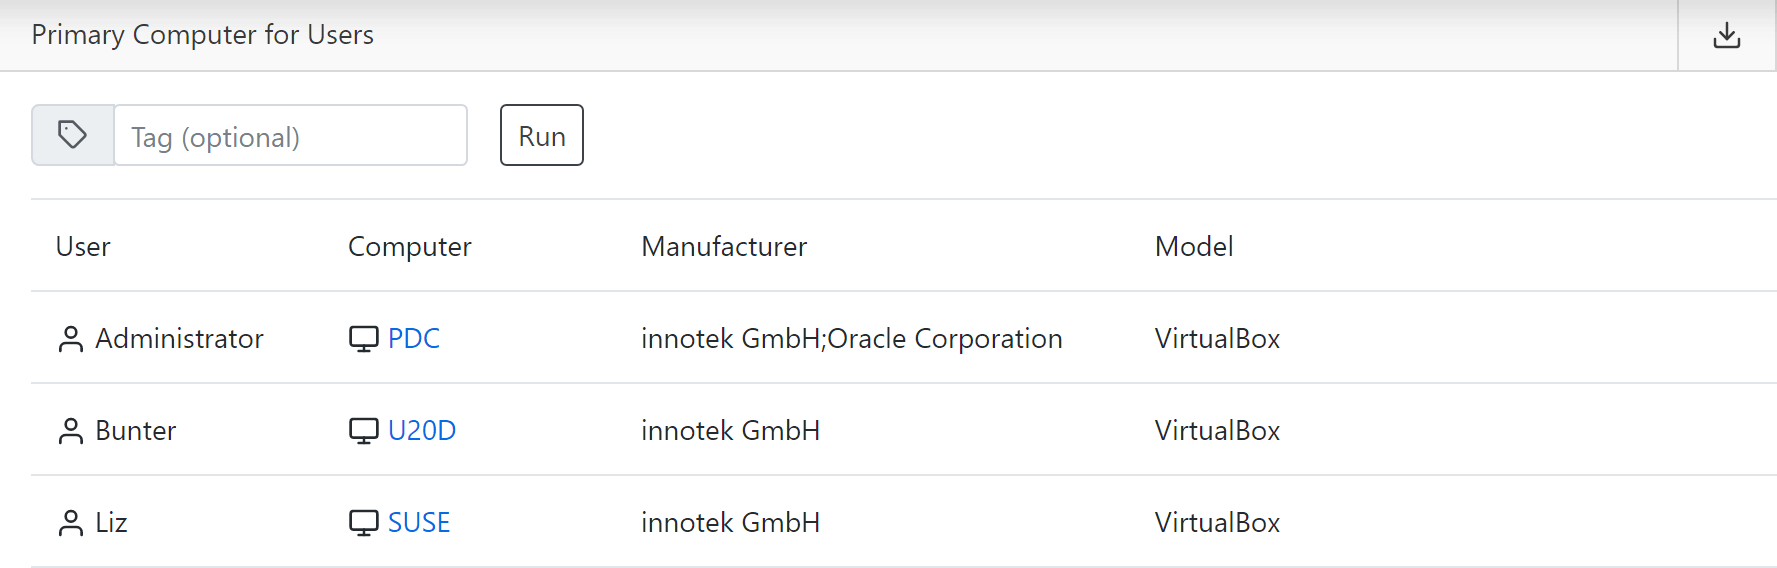
Related to but rather opposite of the Primary User extra, you can use this applet to find the single computer used most by every user in the last 30 days. To start, enter a tag if desired to narrow the results, and then click Run. You can then use the Search bar at the top to filter the display to one particular user.
Primary User of Computers
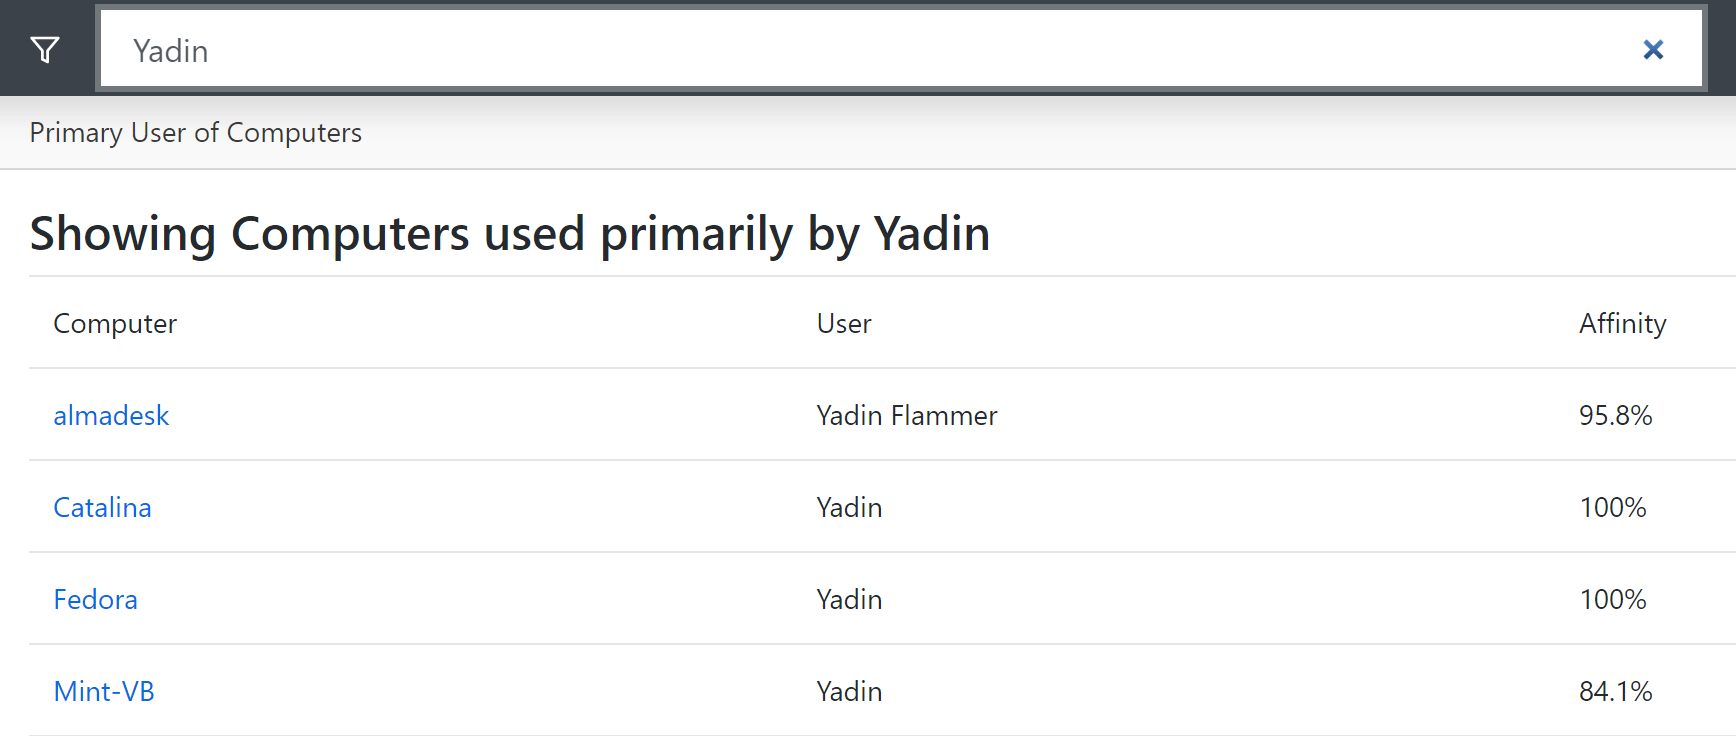
A very simple extra that uses session information to show computers where the primary user in the last 30 days is a given account name. Simply type in the name in the Search at the top to find results that match. Each computer is shown with the matching user account(s) and a % of time that user utilized the computer compared to all other use on the system. Note this is shown as "Affinity". This is the measure that is used to show results in the User Affinity Extra. There is no other function to this extra, it is for simple information only.
User Affinity
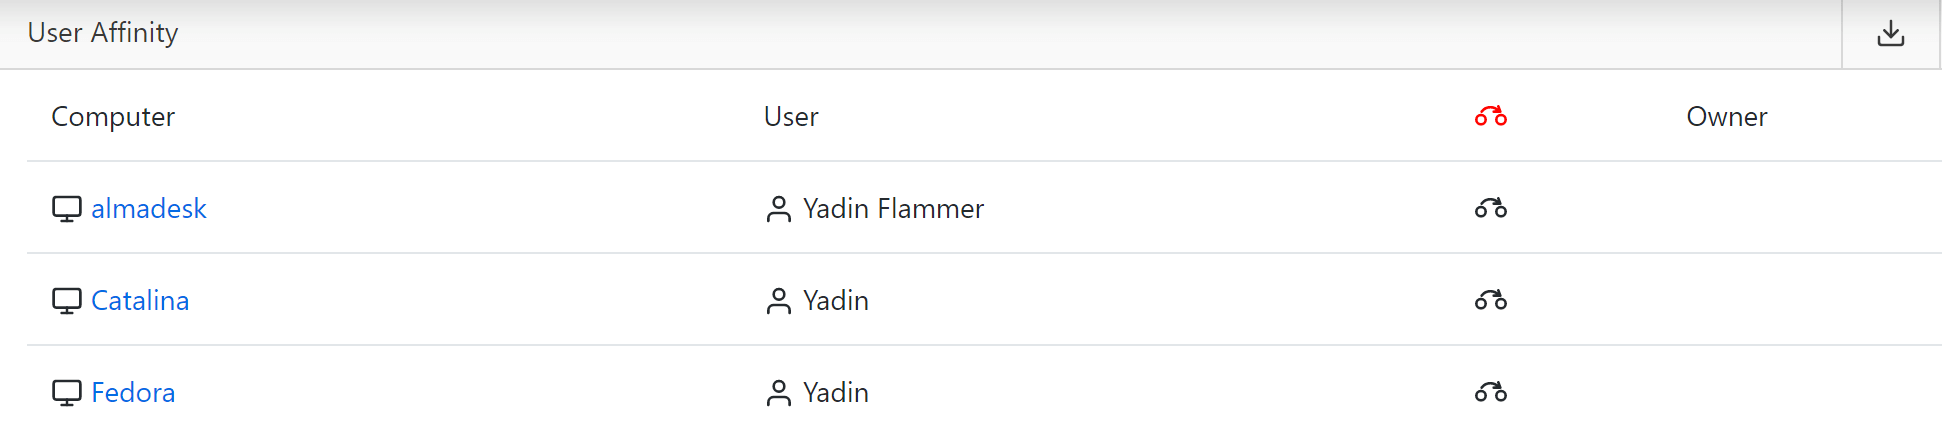
Using session data to determine which user has utilized a computer most in the last 30 days, this extra shows that user for each computer with the option to copy the user to the Owner field of the computer record. If you'd like to see the affinity percentage, you can use the Primary User of Computers Extra. The primary function of this extra however is the copy function. If you click the copy button in the column header, it will copy ALL users shown on the page into the corresponding Owner field of the Computer Details. You can also click the copy button on each row to do select systems. If the copy button is in Red, it will replace a value that already exists. If it's black, the owner is currently blank. If the button is gray, that value is already the same.
There is also a Download button in the ribbon if you want to get a copy of this information.
If you were to use this extra to populate all owner fields by mistake, there is an Admin Script available that will blank the owner field of all selected computers you can use to "reset"
User Assets
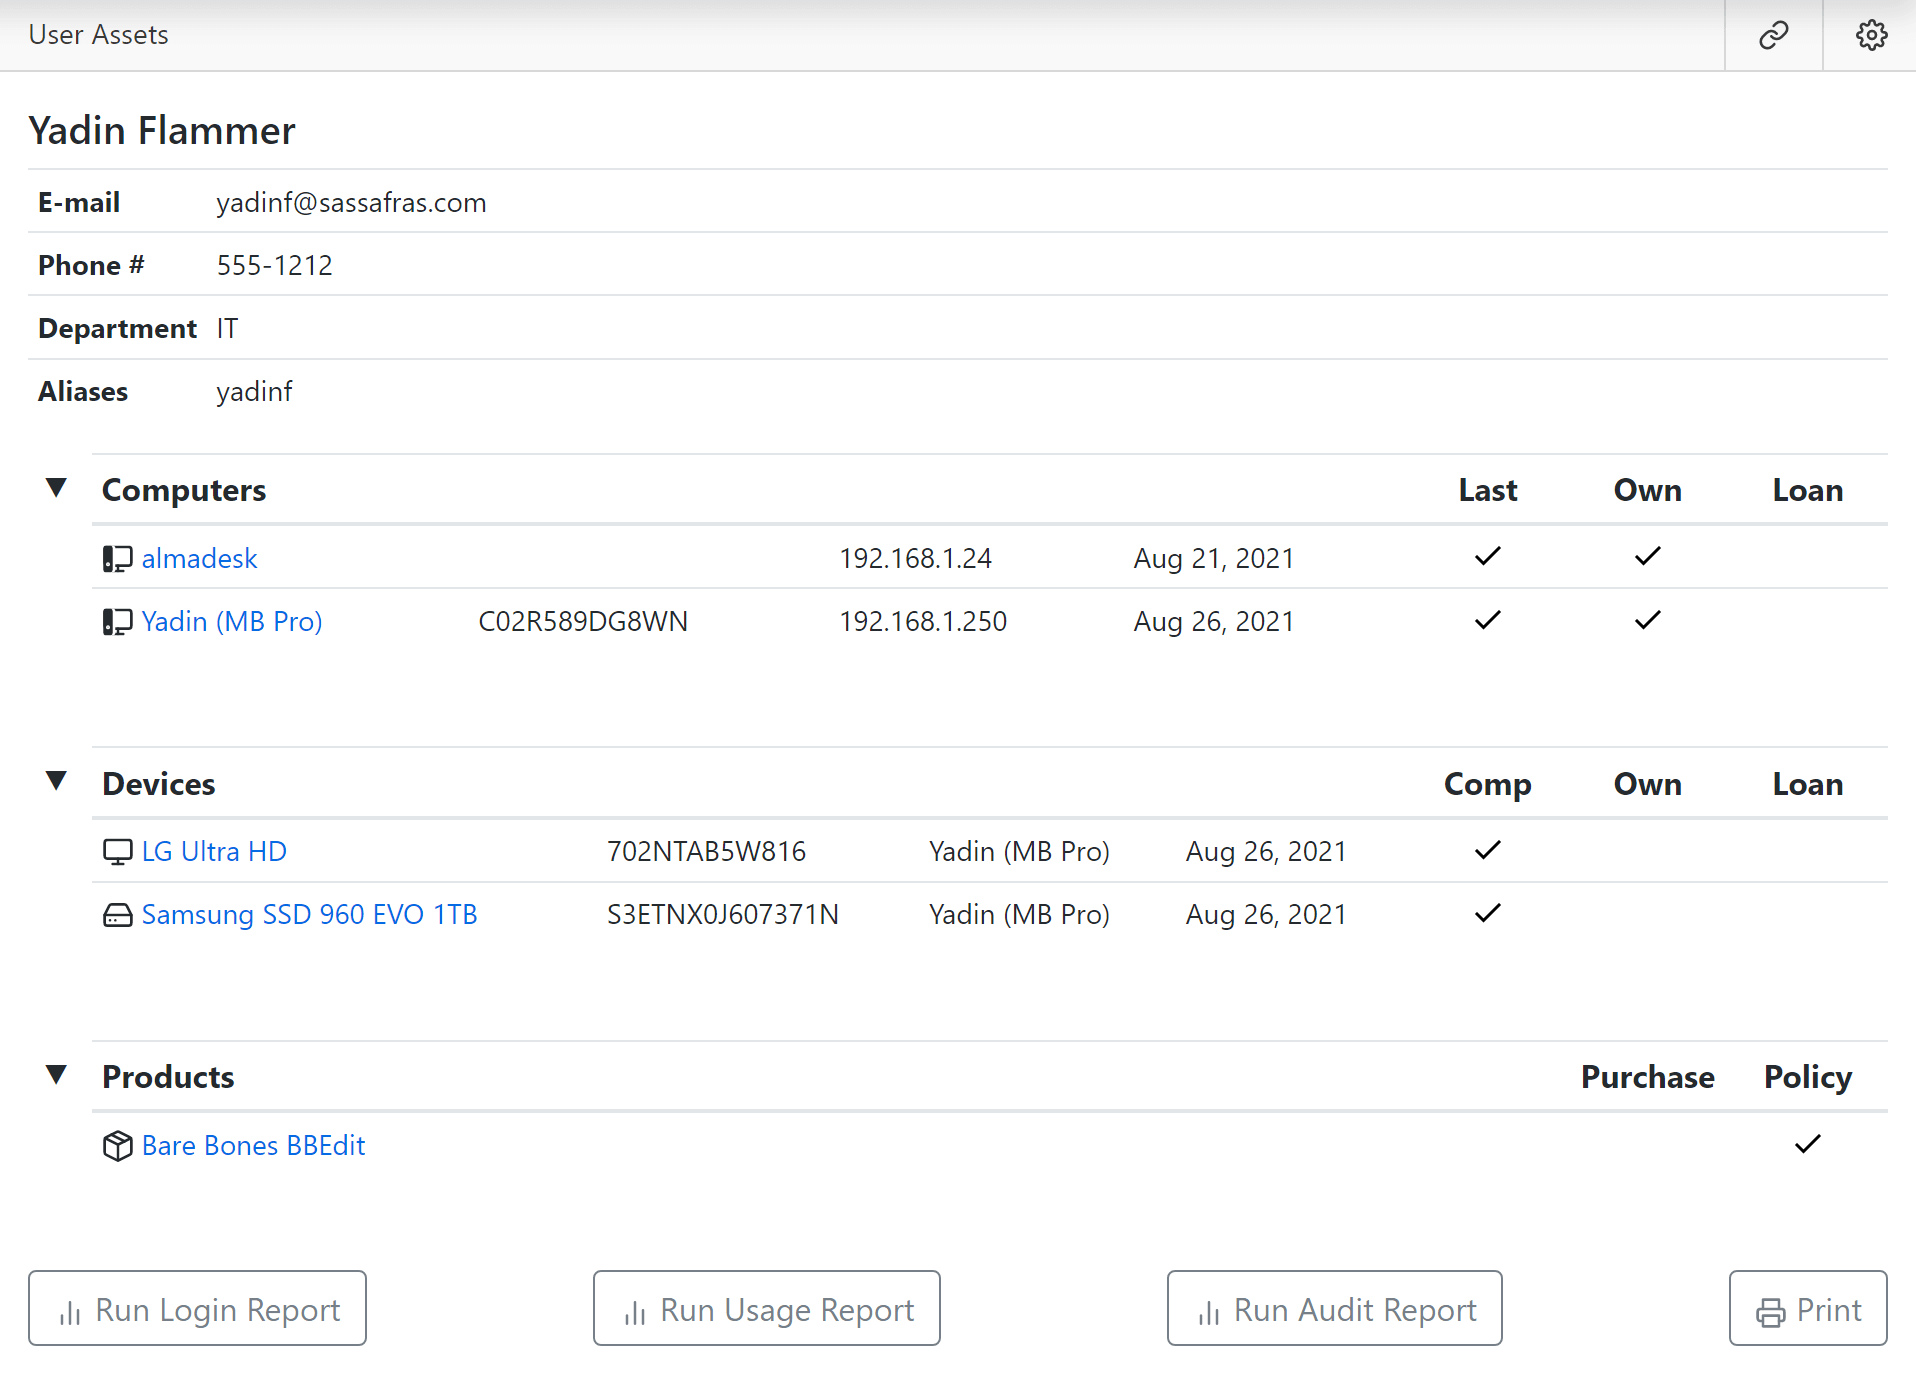
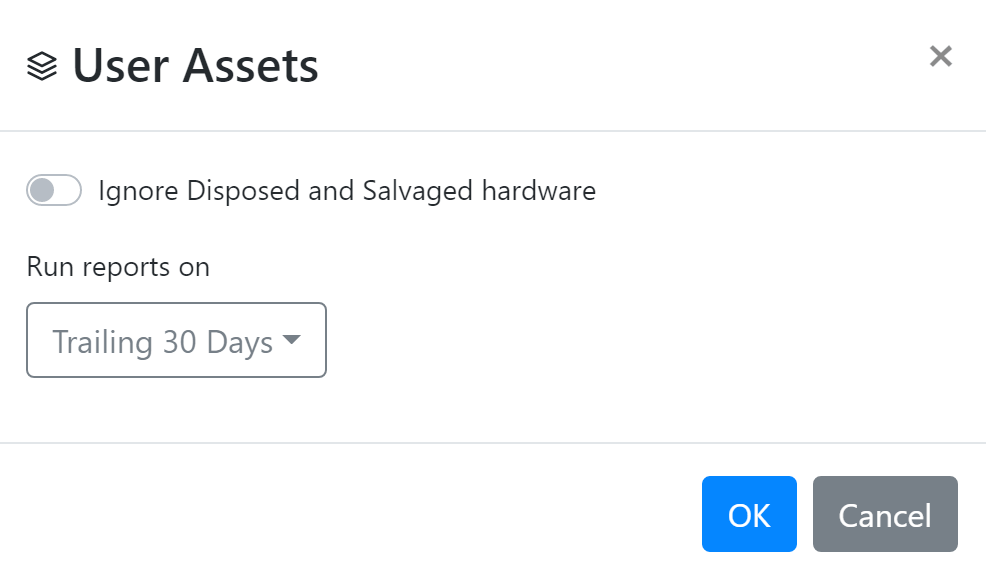
A simple but very useful Extra for those managing inventory, especially when also managing Loaner equipment. As it indicates on load, simply type in a user in the Search, and choose a match from the drop down. You will then be shown a list of all the assets associated with that User. These associations can be due to being set as the Owner in the details, a Loan, or simply that they were the Last person to log in to the computer. It will reflect Computers, Devices, and Products (the latter by way of User based Policy assignments or Purchase Install Codes).
Buttons at the bottom of the screen allow you to quickly generate reports related to this information, or print it out as needed.
You can click on the gear in the upper right to configure some optional settings for the Extra.