Custom Columns and Values
In addition to the myriad of built in data fields for various object types, you can define up to 10 custom fields each for Computers, Devices, and Purchases. You can also create presets for field values, and add custom Lifecycle stages and Device Types. Note that versions prior to 7.8 only had custom columns for Computers which could only be defined in KeyConfigure with a much simpler interface.
Creating and Defining
In order to use custom columns, you must first define labels for them. This can be done in several ways:
Using the Web UI
As the Web UI is often the more popular and friendlier interface we will start with that.

In the top section, you can create preset options for various fields. Clicking the gears for any of the columns brings up the modal to customize them. This is a simple list of one option per line. You can also choose to require one of the presets, or allow for custom entry. There are fields that are Common across Computer and Device records which means they appear for either object type. You can also add values to those columns that will apply to just Computer or Device records under their respective sections. Purchases have their own unique fileds you can create presets for.
Under that section is the area for defining Custom Columns and their optional preset values.
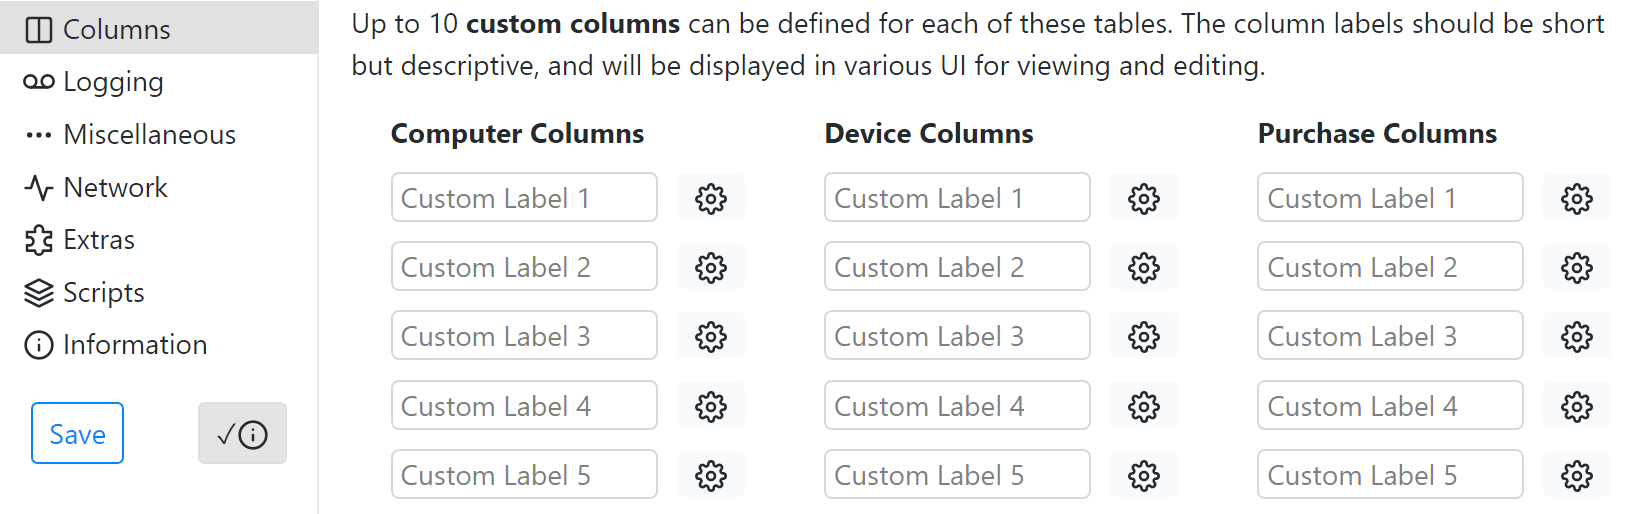
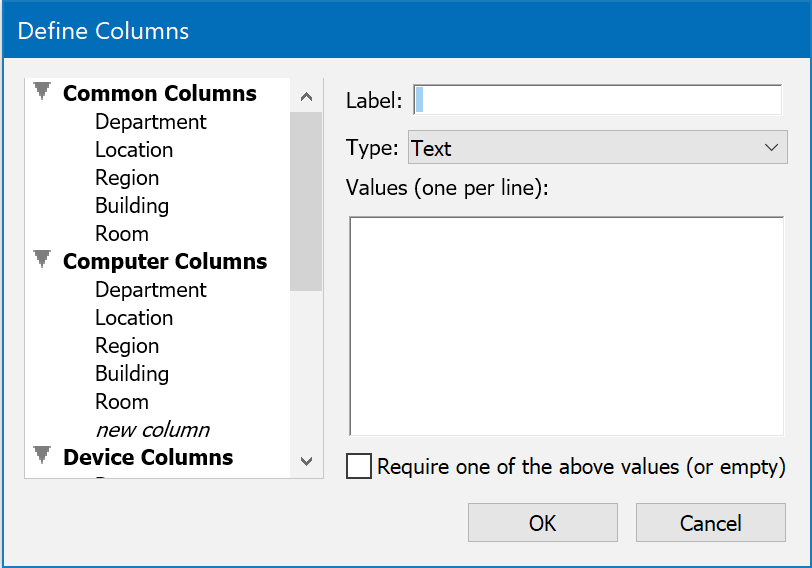
For each object type there are 10 custom labels. You must enter a Label before the gear for it will respond to being clicked. The gear brings up a modal much like the one for the custom values for the built in fields above, but it also includes a Type selector. This allows you to designate if the field is to be used for Text, Numeric values only, Date, e-mail, Phone, or URL. Depending on browser support, the Number type will restrict to numbers only, and the Date type will show a date picker widget. The URL type will show a link for that field in the Web UI for each record hyperlinked to the URL entered.
Note that while you can blank out the name of a column and that may appear to delete it, the field is not removed in the database. All settings persist as well as data, it will simply be hidden for the time being. If you add a new name to that field it is not creating a new one, it is reactivating the old one under the new name.
As of 8.0.0.5 icons will show next to columns that have been configured. The list icon indicates there are choices, and the check icon indicates one of the list values are required (no manual entry).
At the bottom of this page you can Customize Values for Lifecycle stages and Device Categories.
Dependent Values
As of 8.0.0.4 you can create dependencies between fields for values. The format for a dependent value is [DependentField:DependentValue] Choice. For example, if in Region you put Northeast, you can then put [region:Northeast] Main Campus in the Location. Main Campus will only show as an available choice under Location if Northeast is set in the Region. You can add these in bulk from a CSV using the following example format:
region,location,building
Northeast,MainCampus,Spanner
The dependent entries in all fields are created automatically for you when that is imported. That is, in addition to the former example, this would also create [region:Northeast] [location:Main Campus] Spanner under Building. This is convenient as one row in the CSV creates 3 value entries across 3 fields. If you leave a column blank in the CSV then for example the thing in column 3 is dependent on column 1 not 2 (if 2 is blank), so you can import a complex configuration pretty easily.
Using KeyConfigure
Defining both custom columns and value preset in KeyConfigure are handled in one window. For each object type you can click new column at the bottom of their section to add a new custom column. Selecting any column allows you to rename it and choose a data type if it's custom, as well as create a list of preset values. If you are creating multiple columns at once, click on another column after you finish defining the current one to have it save, then click new column again to make a new one.
 Custom columns can be renamed but not removed.
Entering and using Data
There are multiple ways to populate these custom fields (as well as the Asset fields) and leverage that data.
Manual Input
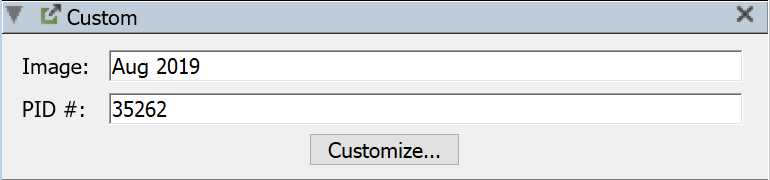
In the Custom pane of a Computer Details window, you can edit/enter/save text values manually. Note though that if a value is discovered on a client (see below), this will overwrite anything that has been manually entered. Generally, you will either populate values on clients, or populate them manually in KeyConfigure - not both.
Sorting and Filtering
Once data is entered you can use it in various ways to sort and target computers and devices. By displaying these custom columns in the main windows you can sort by the column just as with any other data field. While only select fields appear in the GUI for making filters, any field can be used in the advanced capabilities. You can make Filters using the "Match this Filter" area using usr0 through usr9 as the column names. Those Filters can then be used at Targets in Reports.
Importing Values
Custom columns can also be imported in KeyConfigure from a text file. For details on how to do this, see the Import section of the Computers, Devices, or Purchases pages, or read the blog post on Importing Data to Computer Asset fields.
Gathering values from KeyAccess
While you can enter values for these various defined and custom fields in KeyConfigure or the Web UI, they can also be automatically populated in the case of Computers. These values can be read from each client computer from registry or plist values. Also note the Asset ID fields that are implemented in a similar way but serve a specific purpose.
KeyAccess 7.1.0.7 and higher will look for local values to be used in custom fields and send them to KeyServer as part of the hardware audit.
![]() Windows KeyAccess looks in the registry in the directory:
Windows KeyAccess looks in the registry in the directory:
HKLM\SYSTEM\CurrentControlSet\Services\KeyAccess\Settings\options
for keys assetCustom0, assetCustom1, ... assetCustom9. These keys can contain a text value which will be sent to KeyServer, or they can use special syntax to specify that KeyAccess should look in a different registry key or environment variable for the value to send to KeyServer.
%foo%	GetEnvironmentVariable - i.e. any system environment variable can be populated by name like %windir% (not that you'd use that)
<path>	GetRegistryValue - i.e. point to the registry key who's value you want to use
For example, to get the description of the first cpu:
<HKEY_LOCAL_MACHINE\HARDWARE\DESCRIPTION\System\CentralProcessor\0\ProcessorNameString>
![]() Mac KeyAccess looks for the same property names in:
Mac KeyAccess looks for the same property names in:
/Library/Preferences/com.sassafras.KeyAccess.plist
So one way to set these values on a Mac is using the command line:
sudo defaults write /Library/Preferences/com.sassafras.KeyAccess assetCustom0 my_value
On Mac as well, you can specify that KeyAccess should look in a different plist for the string value that will ultimately be sent to KeyServer (this functionality was added in KeyAccess 7.3.0.7). For example, to specify that the first Remote Desktop “info” field should be used for the first KeyServer custom hardware field, do this:
sudo defaults write /Library/Preferences/com.sassafras.KeyAccess assetCustom0 "@com.apple.remotedesktop:Text1@"
This special syntax must start and end with the @ character, and contain the id of the application followed by a colon and the name of the property to be read from the plist.
If you want to avoid running defaults write on your clients, you can also customize the ksp-client installer using k2clientconfig to write these preferences during an install. For example, to use the Remote Desktop info fields as the first four custom computer fields, you would do:
./k2clientconfig -v assetCustom0=@com.apple.remotedesktop:Text1@
		-v assetCustom1=@com.apple.remotedesktop:Text2@
		-v assetCustom2=@com.apple.remotedesktop:Text3@
		-v assetCustom3=@com.apple.remotedesktop:Text4@
		ksp-client.pkg
Whenever a value is found on the client, this is sent to KeyServer, and overwrites whatever value is already in the KeyServer database for this computer.