Full Walkthrough
A Detailed walk through of installing, configuring, and using the Sassafras Suite
I. Getting Started
The purpose of this guide is to give a step by step introduction to the Sassafras KeyServer Platform (AllSight, LabSight, KeySight) including installation, configuration, and common tasks. This is intended to be guided instruction as compared to general documentation found throughout this site. It is also much more detailed as compared to other overview topics.
Related:
It is recommended you review the above documentation items as needed for planning your deployment, and even getting an initial installation. This tour is much more in depth and follows the general training you receive as a new customer. Depending on your organizational structure, you may be the core administrator who performs all these tasks, or you may only be performing the initial installation or the production configuration. Long time customers may find this of interest as the process has changed dramatically since the 7.5 version of the platform in 2019.
Overview
Hopefully you have a basic understanding of the purpose of the Sassafras KeyServer Platform and have reviewed the above Introduction, Outline, and Requirements and are now looking to set up a server. We assume therefore you're excited to see what our asset management suite can do to help your governance of Hardware and Software to reduce costs, enhance services, and enrich data consumption. As mentioned, there are three main components to the suite:
- The Server (KeyServer) which is the heart of the operation and includes the Web Service (KeyReporter)
- The Admin application (KeyConfigure) used to manage the server configuration
- The Client (KeyAccess) which is installed on workstations that report to the server
Once we have covered installing and configuring the server, the most important step is deploying the client. Our KeyAccess client gathers the hardware and software inventory and reports this data to the server. The guide then spends a good amount of time going over the Web UI. This is the more modern and easier to use interface that covers the majority of daily tasks, as well as some capabilities unique to the Web. We will cover organizing your computers into divisions for use on Maps as well as more organized reporting. Dashboards can be set up for your authenticated users to easily review the data collected and visualize your asset information. Guest also can have a dashboard view with rich information about the computing resources, as well as viewing public maps and your Software catalogue. Additional topics like using Printers and Extras, as well as the various configuration options is covered.
Advanced administrators and customers of our AllSight tier of product will then proceed to KeyConfigure for more advanced topics. Things like Product creation and fine grained management of Software Policies will be covered. LabSight customers will rarely use KeyConfigure as most features in that product tier are in the Web UI. If you are a KeySight customer, most of this tour will not be applicable, since KeySight functions differently in many respects than AllSight and LabSight. There is a specific document for KeySight in the side navigation.
Getting the Installers
An important first step! You can obtain the installers for all components of the suite on our Downloads page. Note that only the client installer is shown by default until you "log in" by entering your email address. If you are not yet a customer, or are simply not in our filter yet, simply fill out the evaluation form and you'll then be able to see all the downloads. If you're already a customer we'll simply ignore the eval request, otherwise a member of Sales will follow up with you to offer assistance.
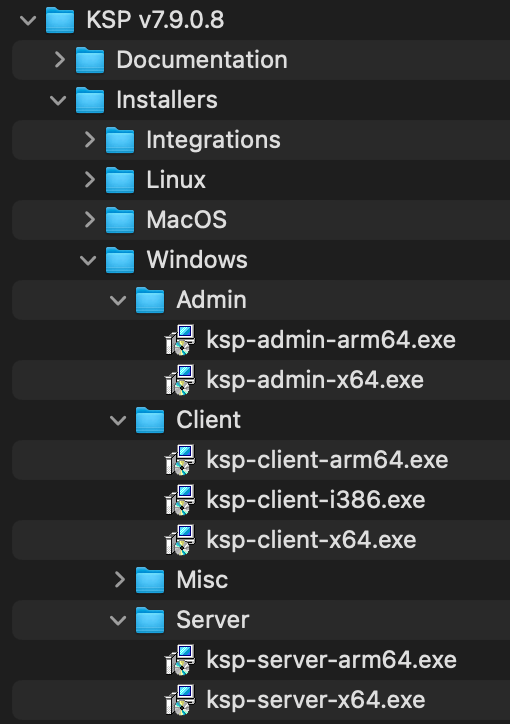
Once on the full download page you will see the full image archives. These archives contain every installer for every platform, along with additional utilities and third party integration files. If you scroll down you will see a table of individual installers per platform.

While a server based OS for the Server component is most common, you can install it on any supported OS. In fact, you can install a copy on your personal machine for local testing. By default it runs in a demo mode with 7 licenses for approximately 45 days as a LabSight evaluation. We have three tiers of product, which along with seat count are unlocked simply by changing the license file and restarting the server service:
For more full details on these product tiers consult our website or contact a member of Sales. This tour will initially focus on LabSight and touch on the AllSight features in context and later on in the tour. KeySight is different in function in significant ways. Use the sidebar link to read more about setting up that use case.
Updates
Minor Updates are issued around every 30-60 days as we add features and correct issues. Major updates are usually anual in the fall, but there is no set schedule. In either case, updates are simply applied in place by running the latest installer for any given component. The server platfrom is fully self contained with no third party dependencies, so there is no complicated upgrade process. Clients are fully forward and backward compatible with the server across any number of minor and major versions, so there is no rush to upgrade them in conjunction with the server. The KeyConfigure admin console needs to be at least within the major release line, but we do recommend keeping on the same minor version as the server for the best experience. The server also has an automatic update feature to have clients silently update themselves.
Running the Installers
This walk through will focus on installing and configuring on Windows as that is the most common platform. Note again that you can run the server and client components on any platform. There will be some differences, especially for Linux which tends to have no GUI and can not run the Admin component of the suite. No functionality is limited by platform choice, but things like Active Directory integration are easier when done on a Windows server bound to the domain.
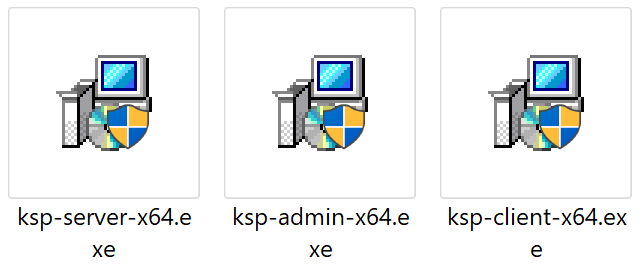
Server
Unless you are a Hosted Cloud customer, the first and most important component to install is the Server, which is the ksp-server installer. Note KSP stands for KeyServer Platform. The core component of the server is the KeyServer service. It also includes the KeyReporter web service. You may be familiar with server hosted solutions that will require separate installation and configuration of third party database and web server solutions like SQL and IIS. The Sassafras Server does not have 3rd party dependancies and includes our own proprietary database and web functionality. While the web service can also be installed in a stand alone configuration from an individual installer, this is not recommended as it causes limitations in functionality and is considered legacy.
Running the installer therefore is very easy, simply double click and follow the prompts. In most cases you want to simply accept the defaults. The install should only take seconds and will automatically start the services when finished. It will then open the default OS web browser to complete initial configuration, which is covered in the next section.
Install Location
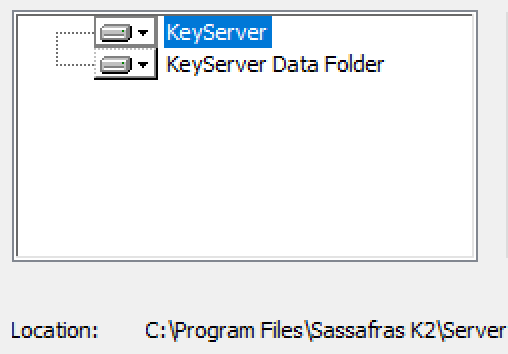
Although you can choose to install in a non-standard location, usually accepting the default is easiest. If needed you can customize both the application and data storage location independently by clicking each item in the installer and browsing for a location. Note that if you do change these support and documentation must be adapted accordingly. As with any customization, needs and impacts must be considered by the customer.
Service Account
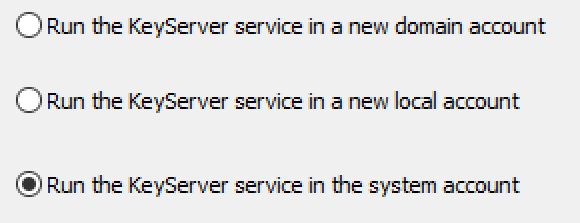
Another option to consider in the installation is if you want the service to run under the system account (default), or a domain service account. Generally in a standard AD configuration using the system account is easiest. Some high security sites may choose to use a service account, which then requires additional configuration to make AD authentication and client OU mapping work. When possible we advise the keep it simple principle.
Admin
The traditional method of configuring all KeyServer settings is with the KeyConfigure admin application. Installed with the ksp-admin installer, this is another easy "click next until done" installation. We recommend installing this on the server for local troubleshooting in the event of network connectivity issues. Otherwise, it is best to install on admin workstations for remote administration rather than needing to RDP to the server to administer it.
Most common tasks and configuration items can be managed in the Web UI. However there are still a few high end and detailed settings or tasks that require KeyConfigure. It's also worth noting that there are some configuration items and features that are NOT controlled by KeyConfigure. These web specific functions include the Dashboard, Maps, and Extras functions in the web UI.
We will look at KeyConfigure in more detail later in the tour. Note that linux users especially will need to skip ahead to that section as the initial system setup can not be done in the web wizard on an OS with no GUI.
Client
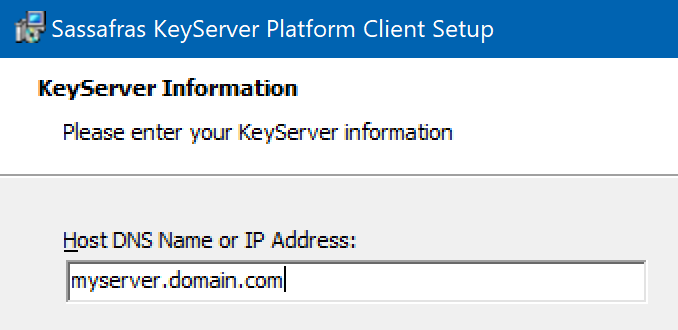
In the next page of the tour (Initial Tasks) you will see that the Web UI prompts you to install clients if you have not already. The ksp-client installer is fully cross platform compatible, although software reporting is not fully automated on Linux due to the nature of that platform. There are a number of options available for customizing the client installation in our documentation. At the simplest, you will run the client installer on a workstation and accept the defaults, changing only the server address. Ensure you point the client to a valid DNS name for the Server. This makes moving the server later easy as the DNS pointer can simply be changed on the network and clients do not need to be modified. Cloud customers will use https:// in front of the server DNS name. On prem customer can use https communications optionally if they want encrypted traffic as opposed to the more lightweight traditional UDP communication.
There is an option to customize the components of the client install. We do not recommend these be changed from the defaults in most cases.

Fundamental operation is that when a user logs in to the OS the KeyAccess client attempts to initiate a session with the KeyServer. Almost no traffic is server initiated, the majority is triggered by the client. If the client can not contact the server, it will gather and cache usage data for known policies and send that data up to the Server the next time it connects. To see the status of the client, open the KeyAccess Control Panel. If there is no active connection, clicking the Logon button will make an attempt and display any problems.
Configuration Wizard
Upon completing the server install, a local setup address using a custom port (http://localhost:19287/setup) will be opened in your default browser. Note on an older Windows server OS this may be IE which may not look great, but will function for this setup. Ultimately for using the Web UI in production we recommend a modern supported browser. Note on Linux this will not occur, and in most cases can't due to typically not having a GUI on a server OS. In that case the traditional method of using the KeyConfigure Admin console from another system must be used.

The setup wizard is largely self explanatory. First you will set a password for the default Administrator account in the KeyServer. This is the "root" local account in our software for initial setup and emergency use. In production you will likely use delegated or external (AD) accounts that are granted admin rights in the configuration. Try not to lose this password, and for security we recommend limited core admins have access to it. We do have a reset mechanism for emergencies.
The next step sets the host for the web service. Please ensure your DNS is configured properly on the network so that this name easily resolves to the server both forward and reverse. This will also be the FQDN for which you obtain a SSL certificate to support https (without security warnings). You can also configure a Proxy if your organization uses one. We do not recommend use of a Proxy as they create configuration challenges, so consider an exception. The two addresses mentioned in this step are required to be available from the server for full functionality. The next step is for configuring the default web ports. Again we recommend using the defaults for ease of user access to things like the availability maps. Asking users to put in custom ports to a url often creates confusion. We offer this option for high security settings or when needed if multi hosting web services on the same host OS and the other services can not use alternate ports. These settings can all be reconfigured later if needed, for example when adding a CNAME to the server.

Choosing how to uniquely identify clients on the next step is perhaps one of the most important decisions of setup as it's difficult to change later once clients have connected. In modern times, Serial number is a popular choice when wanting to use our Lifecycle Management (LCM) capabilities because it ensures a unique ID. If your computer Names are unique due to something like serial or an asset ID in the name, this also allows for full LCM, and can be more reliable for 3rd party hardware that may not have a reliable serial number in the BIOS. Conversely, if you recycle computer names and are looking to support public labs in education while not being as focused on LCM, computer name is more convenient. That is because a new computer with the same name will simply take over the record of the replaced machine as name is the identifier of record. Prior to production setup we do recommend a full conversation with Sassafras Software Support regarding the best choice of Computer ID for your organization. We also recommend closely considering the fallback ID types once setup is finished and you start to configure other settings.
Click here for more details on ID Choice.
As mentioned the most common use case is for Asset Management. This requires an ID type that will persist from order to scrapped and prevent duplication. As such, Serial Number is the most popular choice. The use case for using Name as the second most popular is that the organization doesn't care to retain hardware data. Instead the desire is re-using computer names so that new hardware takes over for old hardware without the need to update Maps. If however the desire is to have retention of the hardware details post retirement, including links to hardware purchase records, Serial is recommended.
Considerations for Serial
Considerations for using Name

Assuming you are running on a Windows server using the local system account in a typical domain, the next option is a simple slider for AD mapping. This allows us to automatically create Divisions (computer folders) when clients connect and organize the computers based on OU mapping. Without this feature, you will need to manually organize computers to leverage certain functions. Domain authentication will be discussed later, and is entirely separate from client mapping.

Once you Save your settings you will be given clickable links to access the Web UI. The custom TCP port used for this setup wizard noted above will be closed automatically and is never accessible outside the local machine. When logging in to the Web UI, use the password you set above. You can leave the name field blank as Administrator will be assumed for convenience. Click one of the links and proceed to the next section of the walkthrough.
If you are a KeySight customer, skip directly to the KeySight section instead.