Enabling HTTPS (SSL) for the Sassafras Server Web UI
The Web Service (KeyReporter) included with the Sassafras Server (KeyServer) supports secure browser connections via HTTPS.
By default, secure connections are made using a self-signed SSL certificate, which suffices for testing. However, browsers will display an error message and indicate there is a problem with the certificate, which might be disconcerting to users:
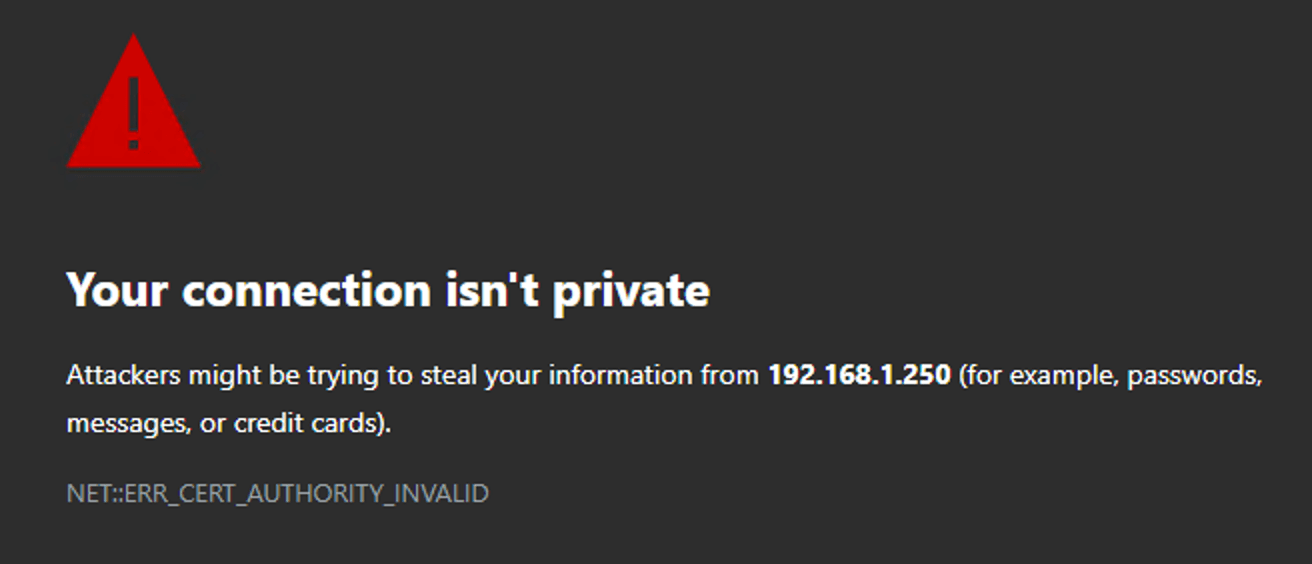
For the best user experience the default SSL certificate should be replaced with one that contains the correct host information and is signed by a trusted Certificate Authority.
This document describes how to generate the information needed to create an SSL key pair, and how to install a CA-signed certificate. The methods described below are not the only ways to accomplish the necessary tasks, nor do we cover all possible platforms and OS versions. There are many resources on the web for this process, and only a few points at the end of this document are unique to Sassafras. In many cases on a Windows host this process is pretty simple, but for some environments more complexity may be needed. Sassafras Support is available to help advise with any questions.
For example, as in the NOTE below, this process may be near automatic on a Windows host using the Windows Certificates MMC. You may use a hybrid in the case of a wildcard cert, where it is put in the MMC but you do need to edit the kr.conf file. We also support services that use the well-known directory method of cert issuance. As such this document provides a lot of information to help guide you in finding the best method for your setting. Please contact Sassafras Support with any questions.
Outline
The process of setting up the Web UI to support HTTPS (SSL) connections consists of four steps:
- Generate a key pair and Certificate Signing Request
- Submit the Certificate Signing Request to a trusted Certificate Authority
- Accept the signed certificate returned from the Certificate Authority
- Install the certificate and key, edit a Sassafras Server Web Service configuration file if needed
NOTE: Many sites know how to get certs on a Windows server and can skip the majority of this document. Simply put, if you know how to get a cert in the Window Certificate storage using MMC, do that and restart the Sassafras Software Web Service. If you are using a simple configuration, this should just work. See the Windows Specific section for more details, and some additional info if you're using service accounts or have more complex certificate needs.
There are multiple ways to do each of the above steps. The instructions below describe two ways to do steps 1 and 3: one way for Windows-based servers, and another way for Unix-based servers (OS X and Linux). Steps 2 and 4 are the same for all platforms, but step 4 is usually not needed on Windows. Despite the slight differences on each platform, the results of steps 1-3, a “PKCS#12” (PFX) file, can be used on any platform. That is, you can follow the steps for Unix platforms below, and then use the resulting PFX file on a Windows-based server (and conversely).
For example purposes, we'll assume the host on which the Web service will run is named “server.ad.sample.net”. This is the name that a browser would use to connect to the Web UI running on the host. All of the files that will be created during this process will use that name (with various extensions) in order to keep things organized.
Step 1: Generate a key pair and Certificate Signing Request
When you create a Certificate Signing Request on a computer, a Private Key is made in the process and stored on the system. It's important therefore to generate the CSR on the host where the KeyServer service will be running. Otherwise, you'll need to export the PFX bundle in step 4 and install it on the actual host so you have the complete certificate chain and private key.
Windows-based servers
A common mistake is to want to use IIS to generate the CSR because it's familiar to many admins. However installing the IIS service on the host will cause it to take control of the default web ports and our web service will no longer be able to start. Additionally, this is a rare case where using a GUI is more complicated than command line. The Windows MMC is rather obtuse for creating a CSR, so we provide the below .inf file information to more easily accomplish this at command prompt. All steps assume Administrator rights.
Open Notepad (or any plain text editor) and create a new file named “server.ad.sample.net.inf” in a convenient location on disk (e.g., on the Desktop). Copy the text below into that document, and change the text indicated in red to match your Country (C), State (ST), City (L), Organization name (O), and Hostname (CN). Note these may need to be consistent with your Certificate Authority subscription.
[Version]
Signature="$Windows NT$"

[NewRequest]
;Change to your,country code, company name and common name
Subject = "C=US, ST=Your State, L=Your City, O=Your Organization, CN=server.ad.sample.net"

KeySpec = 1
KeyLength = 2048
Exportable = TRUE
MachineKeySet = TRUE
SMIME = False
PrivateKeyArchive = FALSE
UserProtected = FALSE
UseExistingKeySet = FALSE
ProviderName = "Microsoft RSA SChannel Cryptographic Provider"
ProviderType = 12
RequestType = PKCS10
KeyUsage = 0xa0

[EnhancedKeyUsageExtension]
OID=1.3.6.1.5.5.7.3.1 ; this is for Server Authentication / Token Signing
Optionally if you need to include additional CNAMES (subject alt names) add this section to the file:
[Extensions]
 2.5.29.17 = "{text}" ; this specifies the OID for the alt names and data type being entered
 _continue_ = "dns=myserveralt1.mycompany.com&"
 _continue_ = "dns=myserveralt2.mycompany.com"
If you only need one CNAME remove the last line and the & from the line before it.
Save the changes you've made to the file. Open a command prompt window as Administrator. Change to the directory containing the INF file and run this command:
[dos-prompt] certreq -new server.ad.sample.net.inf server.ad.sample.net.csr
When this command runs successfully there will be no messages output to the command prompt window. The command will generate a private/public key pair, which it securely adds to the certificate store of the LocalSystem account. A Certificate Signing Request (CSR) file is also created in the current directory, which we've named “server.ad.sample.net.csr”. This file is used in the next step.
Unix-based servers
The command for creating a CSR can be run on any Unix computer that has OpenSSL installed. For security you should create a new directory in your home directory and set its permissions so that only you can view files in it. In this example we'll create a directory named "cert" to store the files we'll work on.[unix-prompt] cd ~ [unix-prompt] mkdir cert [unix-prompt] chmod 0700 cert [unix-prompt] cd cert
The command to generate a private/public key pair and Certificate Signing Request will prompt for some identifying information, which will be added to your certificate and will also be used by the Certificate Authority to verify your identity. The text in bold below is the information you should enter (with your own company and host name in place of the examples):
[unix-prompt] openssl req -out server.ad.sample.net.csr -new -newkey rsa:2048 -nodes -keyout server.ad.sample.net.key
Generating a 2048 bit RSA private key
................+++
writing new private key to 'server.ad.sample.net.key'
-----
You are about to be asked to enter information that will be incorporated
into your certificate request.
What you are about to enter is what is called a Distinguished Name or a DN.
There are quite a few fields but you can leave some blank
For some fields there will be a default value,
If you enter '.', the field will be left blank.
-----
Country Name (2 letter code) [AU]:US
State or Province Name (full name) [Some-State]:New Hampshire
Locality Name (eg, city) []:Hanover
Organization Name (eg, company) [Internet Widgits Pty Ltd]:Sassafras Software Inc.
Organizational Unit Name (eg, section) []:
Common Name (e.g. server FQDN or YOUR name) []:server.ad.sample.net
Email Address []:

Please enter the following 'extra' attributes
to be sent with your certificate request
A challenge password []:
An optional company name []:
The command will generate a private key, which it saves in the file named “server.ad.sample.net.key”. This is a very important file that must be kept secret. The matching public key and Certificate Signing Request (CSR) are also created, and placed in a file which we've named “server.ad.sample.net.csr”. This file is used in the next step.
MacOS Host
Since MacOS includes OpenSSL, it is possible to use the command for creating a CSR, as described above in the Linux section. While you can generate a CSR in KeyChain Access, that UI is severely limited and does not provide the options required by most certificate authorities. Consult the documentation with your CA for more details on how they advise generating a CSR.
Step 2: Submit the Certificate Signing Request to a trusted Certificate Authority
When a trusted Certificate Authority signs an SSL certificate, browsers can securely verify that the certificate is authentic and can be trusted for secure communication with the web server. All browsers trust a large number of CAs by default, so you can use any of these CAs to sign your certificate. Getting a certificate signed by a trusted CA is traditionally not free, so which CA you use might depend on cost as well as any policies within your organization. Services like LetsEncrypt and ZeroSSL have changed this landscape more recently. Each CA has their own process for submitting a CSR.
One thing that all CAs will have in common when signing your certificate is that they will need the information in the “server.ad.sample.net.csr” file created in step 1. For some CAs you will submit this file directly. Other CAs will ask you to copy the file's contents (it is a simple text file) and paste them into a text field in a web form. Follow the instructions provided by your chosen CA. You might be required to prove your ownership of the host/domain for which the certificate is being created. Some newer services do this by requiring you put a file on your web server (you can create a folder called .well-known in the server/KeyServer Data Folder/Helper Data/KeyReporter Data Folder as needed for this if the CA requires it), or put entries into your DNS. Again consult with your CA documentation for details.
Some CAs might ask you what type of server you will be using the SSL certificate on. For this question, answer “IIS” for Windows and “Apache” for unix.
The process of signing a certificate might take from a few hours to a few days, depending on the level of verification that a CA requires. Once the CA has signed your certificate they will make it available to you, either via their web site or via e-mail. The signed certificate might be provided in the form of a file, or in the form of simple text that can be copied and pasted into a file you create. However it is delivered, save the signed certificate in a file named “server.ad.sample.net.crt”, and save it in the same place as the other files we've created during this process.
Step 3: Accept the signed certificate returned from the Certificate Authority
After a CA has signed your certificate you must accept the signed cert, which matches it with the private key that was generated in step 1. Once accepted, the certificate and key pair can be used for secure communication.
Windows Hosts
In most cases it's easiest to just double click the .crt or .cer file you receive from the CA and tell Windows to install it. You can open the Certificates MMC and import inside that tool as well, and verify the certificate is in place. If you have not used this tool before:
- In the Windows menu type in mmc and choose to run mmc
- Go to File -> Add/Remove Snap-in
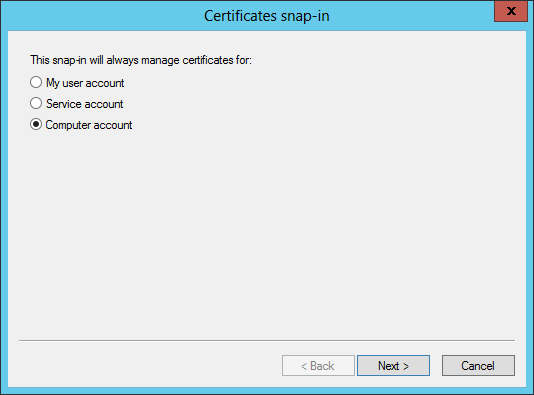
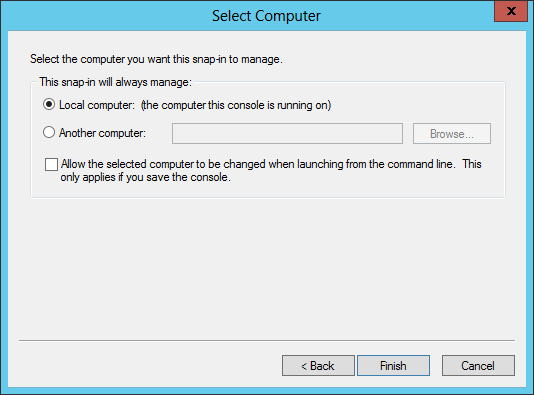
- Double click on Certificates. Choose Computer account from the list and click Next. Choose Local computer and click Finish.
- Click OK. Expand Certificates in the side navigation.
For clarity, tradition dictates that the certificate be imported under Personal. You may also need to import Root or Intermediate certificates as provided by your CA. These should typically be put in Trusted Root Certification Authorities. Consult your CA documentation for more details.
Once imported, you should see your certificate and it should have a little key icon in the corner of the icon. This indicates the cert matches a local key and will therefore be valid. Note if you are replacing a certificate, you should remove the old cert to avoid a conflict.
You can also use command prompt to do the import. The command for accepting a signed certificate must be run on the same computer that you used in step 1, using an account with Administrator rights. Open a command prompt window as Administrator. Change to the directory containing the CRT file you received from the CA and run this command:
[dos-prompt] certreq -accept server.ad.sample.net.crt
When this command runs successfully there will be no messages output to the command prompt window. The command will match your certificate with the private key that was generated in step 1, and add the certificate to the LocalSystem store. From there we will export the signed and matched pair. You can check whether everything worked as expected using the following command:
[dos-prompt] certutil -viewstore MY server.ad.sample.net.crt
This command will display a dialog with information about your certificate:
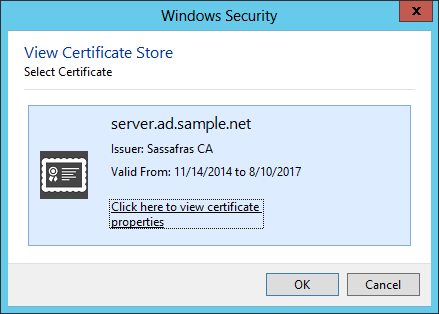
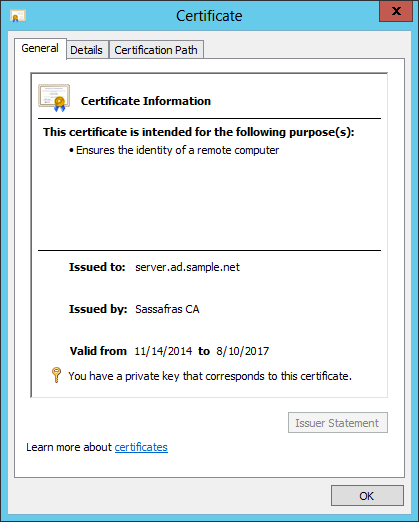
Click the highlighted link to see more details. You should see that the certificate “ensures the identity of a remote computer”, and that “you have a private key that corresponds to this certificate.”
> Show how to check that the certificate was accepted using the GUI
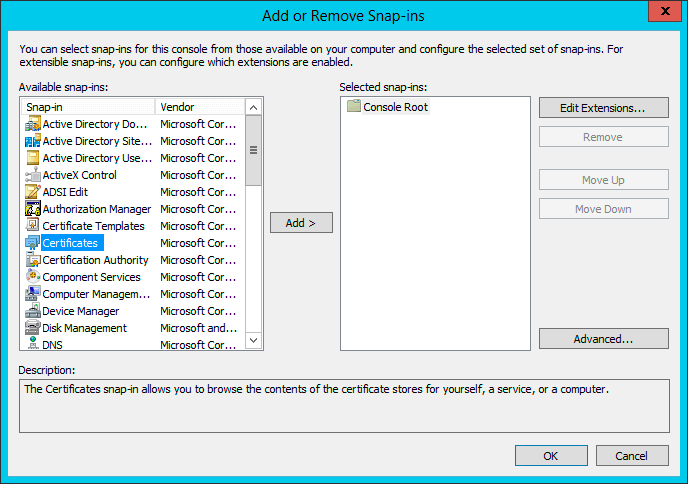
From the Start menu (or the command prompt), run “mmc.exe” (Microsoft Management Console). From the File menu choose Add/Remove Snap-in. In the Add/Remove Snap-in dialog locate the Certificates snap-in and click Add (shown below).
Click on Computer account, then Next (shown below).
Verify that the Local Computer is selected and click Finish (shown below).
Click OK in the Add/Remove Snap-in dialog, and the main MMC window will now contain a Certificates container as shown below. Expand the Certificates and Personal containers and click the Certificates folder, as shown below. You should see the Certificate you created in the list on the right.
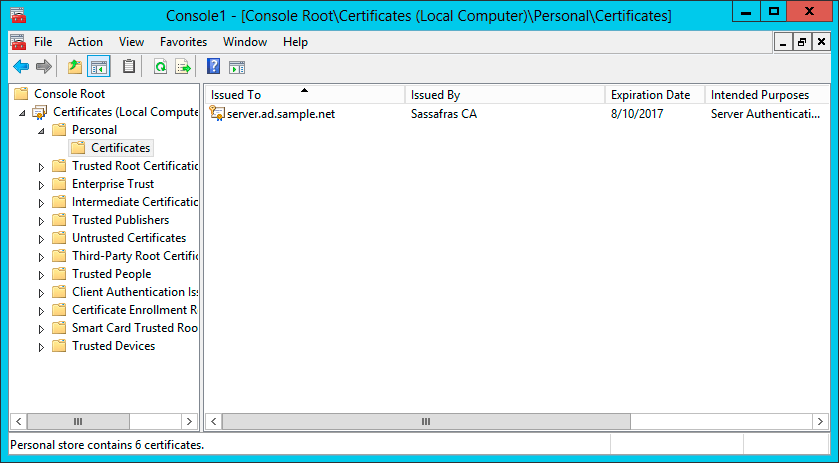
Double-click on the certificate to see more information. You should see that the certificate “ensures the identity of a remote computer”, and that “you have a private key that corresponds to this certificate.” Click OK to dismiss this window.
Optional Export
If everything checks out, you can (if needed) export the certificate and private key to a PKCS#12 (PFX) file. The exported private key needs to be protected with a password. The password should not contain the “:”, “@” or “<” characters. Pick a strong password, e.g., “x3oM.8pv^Eud”. Note this is not needed on Windows in many cases, and it is more secure if you do not do this step. See below for Advanced options in this case.
Back in the command prompt window (running as Administrator), run the following command and enter your chosen password when prompted:
[dos-prompt] certutil -exportpfx server.ad.sample.net server.ad.sample.net.pfx
MY "Personal"
================ Certificate 1 ================
Serial Number: 04
Issuer: E=ca@sassafras.com, CN=Sassafras CA, L=Hanover, S=NH, C=US
 NotBefore: 11/14/2014 2:45 PM
 NotAfter: 8/10/2017 2:45 PM
Subject: CN=server.ad.sample.net, O=Sassafras Software Inc., C=US
Non-root Certificate
Cert Hash(sha1): b8 81 8c 12 aa d4 c7 94 f7 97 6d a1 3c 46 56 c7 dc f2 00 10
  Key Container = 40428c704df5117bccc610b2b9b66276_c1299b2f-7484-4d2e-9fd9-c0e9dccd2284
  Simple container name: CertReq-e0b34435-eec7-4629-a7db-23247a1f8539
  Provider = Microsoft RSA SChannel Cryptographic Provider
Encryption test passed
Enter new password for output file server.ad.sample.net.pfxEnter new password:
Enter new password: x3oM.8pv^Eud
Confirm new password: x3oM.8pv^Eud
CertUtil: -exportPFX command completed successfully.
The output message will be slightly different from the example above, since your host name will be different, as will your organization and CA. The important part is the last line, which indicates the command worked. The certificate and key will have been exported to the “server.ad.sample.net.pfx” file, which will be used in step 4.
> Show how to export using the GUI
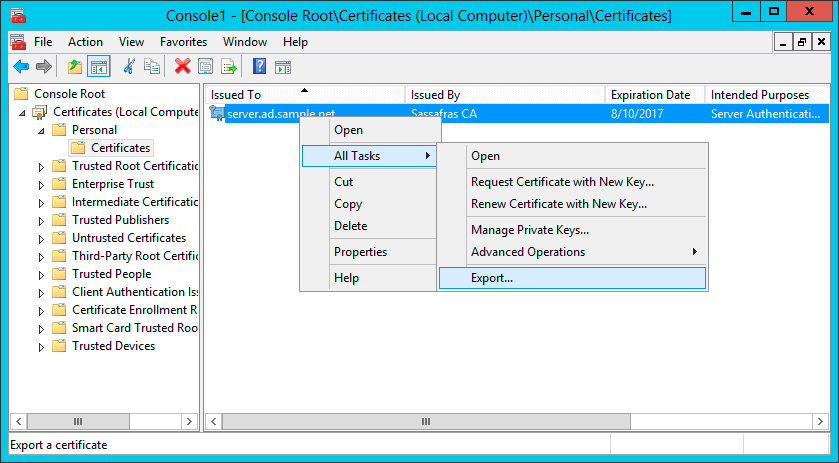
If you prefer to use the GUI to export the certificate and private key, you can do so using the Microsoft Management Console Certificates Snap-in. Expand and read the section “Show how to check that the certificate was accepted using the GUI” above for instructions on opening the Certificates snap-in. Once you've opened the Certificates Snap-in, select the certificate and right-click to choose the Export task, as below.
Wonder in the glory that is the “Welcome to the Certificate Export Wizard” page. Then click Next.
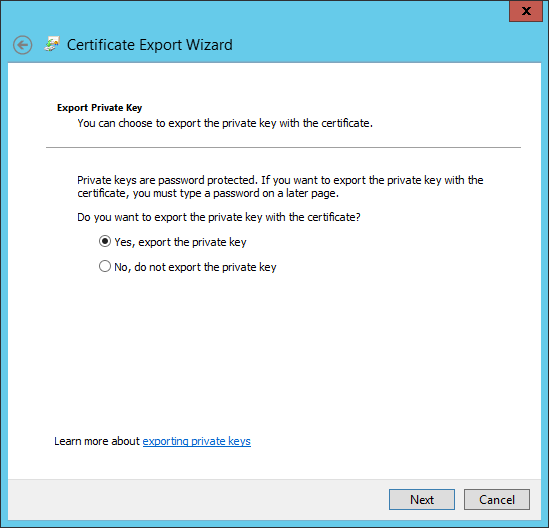
Choose to export the private key, then click Next.
We need a PKCS#12 (PKS) file, and it's good to have the full certification path as well. Click Next.

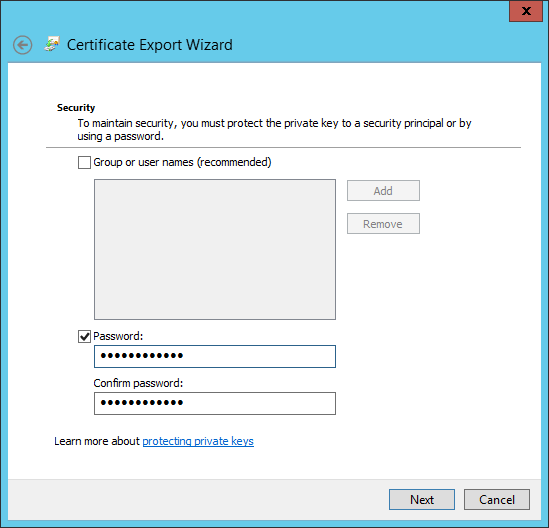
The exported PFX file will contain the private key, which needs to be protected with a password. Type a strong password, but do not use the “:”, “@” or “<” characters. Next.
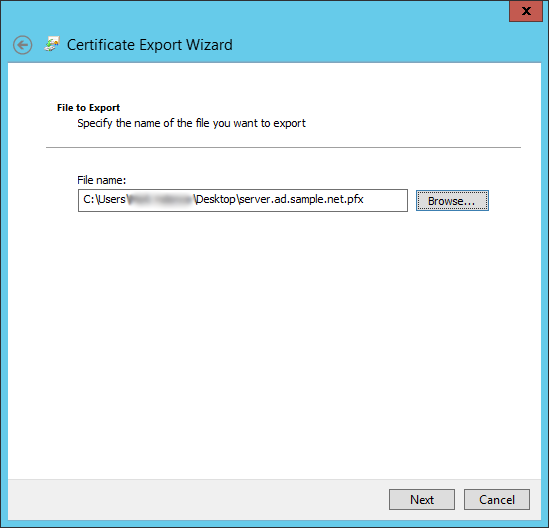
Save the exported certificate in a file named “server.ad.sample.net.pfx”, in keeping with our file naming convention. Next.
We're almost there. Double-check that the settings are correct in the somewhat cramped final page, then click Finish.
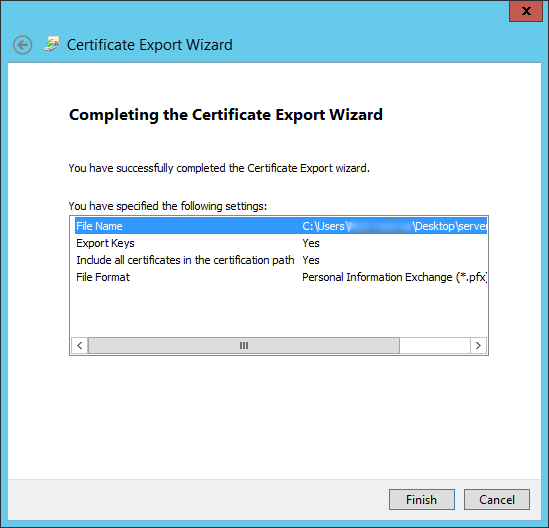
If all goes well, the export will succeed.
Unix-based servers
The private key and signed certificate files are now merged into a PKCS#12 (PFX) file. The private key needs to be protected with a password. The password should not contain the “:”, “@” or “<” characters. Pick a strong password, e.g., “x3oM.8pv^Eud”. Run the following command to place the private key and signed certificate into a password-protected PFX file. Enter your chosen password when prompted.
[unix-prompt] cat server.ad.sample.net.key server.ad.sample.net.crt | openssl pkcs12 -export -out server.ad.sample.net.pfx -name server.ad.sample.net
Enter Export Password: x3oM.8pv^Eud
Verifying - Enter Export Password: x3oM.8pv^Eud
The certificate and key will be exported to the “server.ad.sample.net.pfx” file, which will be used in step 4.
At this point you have four files, only one of which you need to keep. Once you have configured the Sassafras Server Web Service to use your certificate and have verified that everything works, you should delete all the files except for the PFX file, since they contain sensitive and unencrypted data that is no longer needed. This command will delete the unneeded files (make sure you know the password for the PFX file, otherwise you will have to go through this entire process again):
[unix-prompt] rm server.ad.sample.net.key server.ad.sample.net.crt server.ad.sample.net.crt
Step 4: Configure the Web Service
Windows
The signed and accepted certificate and key pair must be placed in an accessible location, and the Web service may need to be configured with some information about the certificate. In the case of a Windows host in a basic configuration, nothing further may be needed other than restarting the web service to pick up the cert installed in step 3. The considerations for this are:
- The KeyServer Service is running under the local system account
- The CN of the cert matches a DNS name on the host server, with proper forward and reverse lookup in DNS
- The CN of the cert matches the Hostname set on the web service
- There are no other conflicting certs for the server (e.g. a domain RDP cert for the same FQDN)
In KeyConfigure, open up Config -> Web Service Settings. On the Advanced tab check the hostname is set properly. On the Status tab stop and then start the web service. Be patient and don't overclick the button or you may stop it again.
PFX Method
For more complex environments, to deal with atypical certs, and on Unix hosts, we typically need to use the PFX export in the above step to configure the web service.
Move the “server.ad.sample.net.pfx” file created in step 3 into the server/KeyServer Data Folder/Helper Data/KeyReporter Data Folder. You will also see a file named “kr.conf” in this directory. Open the “kr.conf” file with any plain text editor (e.g. Notepad) and look for the following entry:
<key>certname</key>
<string>keyreporter:Sassafras@kr.pfx</string>
By default this entry points to the self-signed certificate. If you don't see this key, add it anywhere inside the <dict> section of the file. Change it to point to your customized PFX file name, with the password you used when exporting the bundle:
<key>certname</key>
<string>server.ad.sample.net:x3oM.8pv^Eud@server.ad.sample.net.pfx</string>
The format of this setting is the subject name of the certificate (which should be the same as the host name of the computer running the Web service, if all of the preceding steps were followed), then the “:” character, then the password used when exporting the certificate and private key, then the “@” character, then the name of the file that contains the certificate and private key. Note on Windows if this entire key is not in the conf file it is inherently assumed to be *@* which means look for a cert that matches the configured Hostname in the Windows certificate storage.
Once the “server.ad.sample.net.pfx” file is in place next to the “kr.conf” that refers to it, restart the Web process (if it is running as part of the KeyServer installation, run KeyConfigure and select Web Service Settings from the Config Menu, then Stop and Start from there). When the Web service is running again you should be able to connect over HTTPS from any browser. The browser should not display any certificate error message, and instead should indicate that the page is secure. Most browsers show a padlock as an indication of a secure connection.
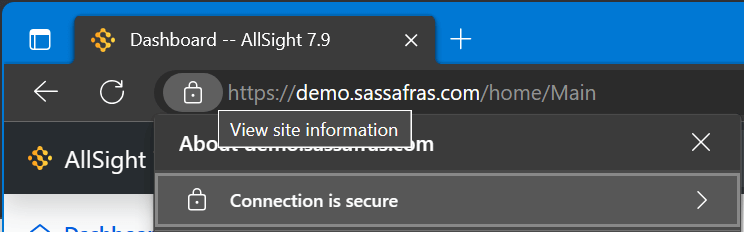
In most browsers, clicking the padlock icon displays information about the certificate that was used to secure the connection. View the certificate to make sure it is the one you just installed and configured.
The “server.ad.sample.net.pfx” and “kr.conf” files contain sensitive information that you do not want untrusted people to access. It is advisable to set the permissions on these files so that they can only be read by the appropriate accounts (including the account that the Web service runs under).
Windows Specific Information:
While the above detailed steps have full details for the certificate process that cover a wide array of situations, this can often be very simple on a Windows server. Consider these assumptions:
If these are all true, then it is likely your setup of SSL in the Sassafras Server is as easy as putting your certificate in place and restarting the Web Service in KeyConfigure. As of 7.7 we should automatically pick up the certificate if the above conditions are met. And that's it in one sentence, the rest of this document is not important to you!
Otherwise, you may need to still configure the kr.conf file with the specific cert DNS name in question (see step 4 in the above sections). It has also been seen where a wildcard cert would not work without being exported to PFX (again see above sections for that process) for reasons specific to that cert provider. It is simpler to not have to export the PFX bundle if not needed, and you avoid the security concern of the pfx password being in the kr.conf file.
If you need more details or have more complex needs, review the four steps in the above sections, then follow the instructions below for your specific use case.
The LocalSystem Case
If the Web Service runs in the LocalSystem account AND you performed steps 1-3 on the host computer that runs the service, the keys and certificate are already stored securely in the Windows certificate store. In many cases this means you are done, but you may need to point the configuration explicitly if there are multiple certs for other purposes on the server. Open the “kr.conf” file with any text editor and look for the “certname” entry as before. Change it to point to your certificate in the Windows certificate store:
<key>certname</key>
<string>server.ad.sample.net@*</string>
Notice that we've removed the password from the “kr.conf”, so that is no longer a potential security hole. This new setting is telling the Web Service to look for your certificate not in a PFX file, but in the local machine certificate store.
Restart the Web Service and test the browser connection again. Make sure that the browser can create a secure connection, and that your certificate is being used to make the connection. Once you have verified that things are working as expected, you can remove the “server.ad.sample.net.pfx” file from the KeyReporter Data Folder.
You can also use wildcard certificates by specifying the wildcard domain instead of a FQDN, as in *.ad.sample.net. You can also simply specify *@* to say "look for any matching certificate in the cert store". Make sure however if you do this that only one certificate is in the store, otherwise it could pick up the wrong one. This means you should remove older expired certs when renewing as well.
The Service Account Case
If you are running KeyServer (or KeyReporter in a stand alone instance) under a service account, that account will not implicitly have access to a certificate installed in Windows. If you're familiar with certificate management, simply use the Certificates MMC to grant the service account permission to read the certificate in the cert store (again typically in the Personal storage under the Local Computer. It is easier to have KeyServer running under the Local System account for this reason, but there are special cases that require the service to be run under a service account. If you need assistance as you are unfamiliar with certificate management you can contact Sassafras Support.
Security Settings
There are several security related options you can set in KeyConfigure - Config - Web Service Settings. The main one is to force HTTPS. As normal this requires http still be open and active, it just auto forwards to https immediately as with other web servers. On the Advanced tab of the settings are some other options some sites like to employ, like setting a HSTS timeout or modifying how cross-origin checks are handled. For everything else, there are options that can be manually added to the kr.conf file.
Setting the Protocol Level
In the kr.conf file (C:\Program Files\Sassafras K2\Server\KeyServer Data Folder\Helper Data\KeyReporter Data Folder\ on Windows, /usr/local/k2/KeyServer Data Folder/Helper Data/KeyReporter Data Folder/ on Linux), you can add this section:
<key>sslprotocol</key>
<integer>6</integer>
With a value based upon this chart:
0: default, use highest protocol that the client supports
1: SSL2 or higher
2: SSL3 or higher
3: TLS 1.0 or higher
4: TLS highest version supported by client
5: TLS 1.1 or higher
6: TLS 1.2 or higher
This will work for Windows and MacOS based servers. Linux OpenSSL uses a local configuration to determine allowed protocols which is outside our scope and control.
Note that if you are running the Web Service on a Windows Server OS it is advised by Microsoft that you manage these protocols in the OS rather than by the above setting. Set the sslprotocol per above to 0 then manage the host settings in the Windows Registry. See https://docs.microsoft.com/en-us/windows-server/security/tls/tls-registry-settings for more details.
Setting the Ciphers
Also in the kr.conf you can use the following keys to set what cipher suites you want to allow:
By algorithm:
<key>ciphers</key>
<string>AES,ECDH,MD5,SHA1</string>
Allow Windows (only) to pick what it thinks is best:
<key>ciphers</key>
<string>STRONG</string>
Set specific ciphers only:
<key>ciphers</key>
<string>EECDH+AESGCM:EDH+AESGCM:AES256+EECDH:AES256+EDH</string>
Note that these options are not available when the Web Service is running on MacOS.
Other Options
Some of these are in newer installations by default, older installations may want to add them for security. Depending on your environment you may need to consider the available values. e.g. If you are embedding Web elements in other pages, or embedding other pages in Dashboard widgets, then certain cross site settings would prevent this from working. These examples are to indicate what options are available, it is left to the customer to determine the best settings for their needs.
<key>headers</key>
<string>
	X-Content-Type-Options: nosniff
	X-XSS-Protection: 1; mode=block
	X-Frame-Options: SAMEORIGIN
</string>
See also:
To manage cross site origins use:
<key>corsurl</key>
<string>host.here.org; other.there.net; http://test.cloud.com:8080; https://test.cloud.com:8443</string>
To allow other servers to embed content from our web service, use:
<key>embedders</key>
<string>host1.domain.org host2.domain.org</string>
Wildcarding is supported so you could do *.domain.edu to cover any server inside your organization's DNS zone. In one instance of digital signage, local file caching was used so a syntax of file://SD:/path/to/our/html/file.html was needed in this key.
Conversely in order to embed 3rd party content into our widgets (i.e. using an iframe in the generic html widget) you need to specify allowed sources (7.8.1.0 and later):
<key>embedding</key>
<string>source1.domain.org source2.domain.org</string>
To restrict login access by subnet, use something like:
<key>neighborhood</key>
<string>192.168.1.0/24</string>
This defines the subnet from which authenticated (non-guest) connections can be made. Connections from outside of that subnet will not display the Login/Account in the upper right of pages, and will not prompt for name/password. To disable the auth for everyone, use something like 0.0.0.0/24.
Connections from localhost (127.0.0.1) will always allow authentication. There is currently no mechanism for whitelisting an IPv6 subnet.